
Fitting a new bolt-on neck - Part 2
Last time, we looked at how to deal with a common problem when fitting a replacement bolt-on neck—namely that the new neck is sometimes too big for the pocket in the body. This week, we'll check another common issue with aftermarket necks:
The screw-holes don't match.

In this case, the replacement neck came with the usual four holes whereas the original neck fitted with five screws. More often, you'll probably be replacing a four-hole neck with another four-hole neck but will find one or two (or all) holes don't quite match. Either way, the fix is the same. By the way, the necks in the photo above are as-they-came. Those machining marks are from the factory and not any plugging like we'll discuss below.
First off, you want to find out what matches and what doesn't. Offer the new neck up to the pocket and mark the positions of each hole. You can do this by inserting the screws through the holes and giving them a little tap so their point makes an impression on the new neck. I prefer to use a brad point drill bit. Chose one that closely fits the screw holes in the body but allows enough movement to easily twist. I can give each a little twist to mark the position on the neck heel. Either of these methods works fine.
Now, to plug the unwanted holes in the replacement neck heel. What you don't do is squirt in some glue and shove a dowel into the holes. If your new hole location is anywhere near the plugged holes, the difference in grain direction between the dowel and the neck can cause the drill bit to wander, leaving you with a less than precise hole. Better to make some plugs so you can better control the grain direction.

You can see the grain at the end of the neck. This is pretty closely flat sawn, with the grain running mostly across the neck. It's good to roughly match this if at all possible. You don't need to go crazy with matching but something that's close is best. Cutting some plugs from the wood shown will keep things in pretty good shape. On the other hand, if you were to use dowels to plug the holes, the dowel grain would run perpendicular to that of the neck.
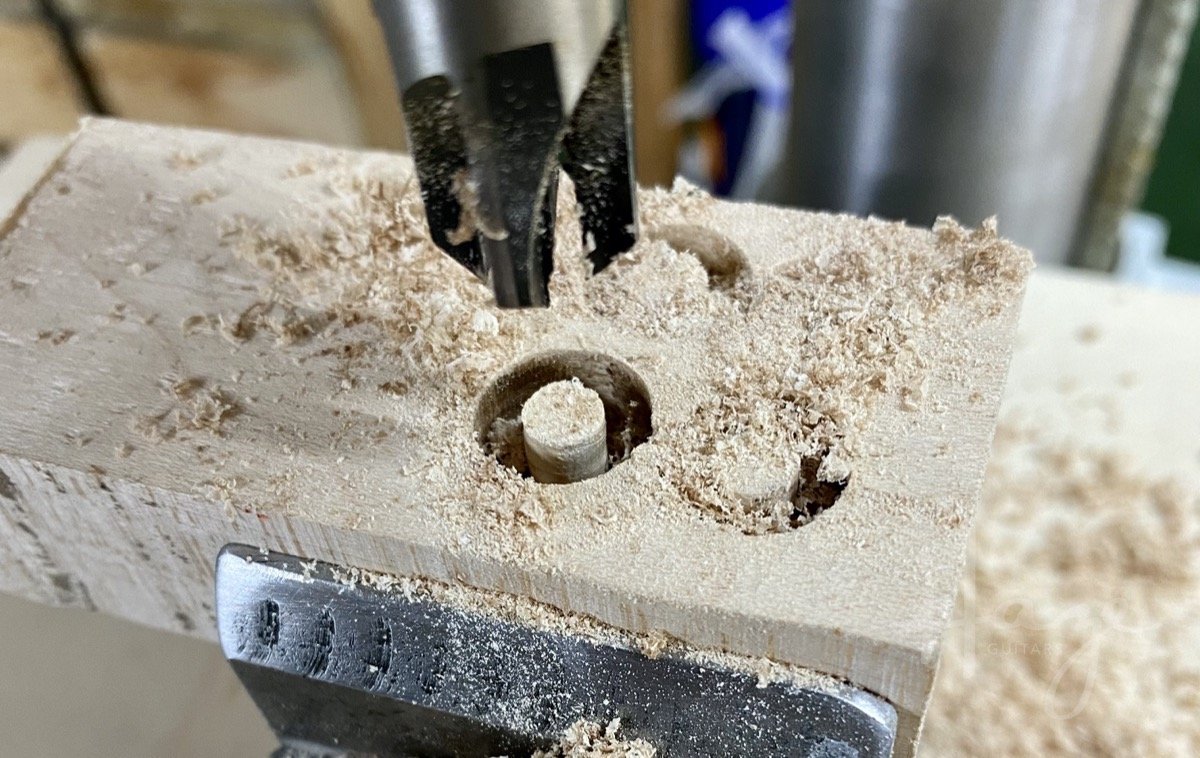
Run your drill slowly when cutting plugs. A pillar drill is much better for this job than handheld.
After cutting your plugs, you're almost certainly going to have to widen the holes in the neck heel to accept them. This is one occasion where a twist drill will likely be fine. However, if you have to widen the holes by more than a millimetre or two (maybe 5/64") I'd recommend stepping up in stages.

Again, a pillar drill is best for this job. If you have a vice for your drill table, you can use that to hold the neck but a radius block underneath the fretboard works well to keep it from wobbling.
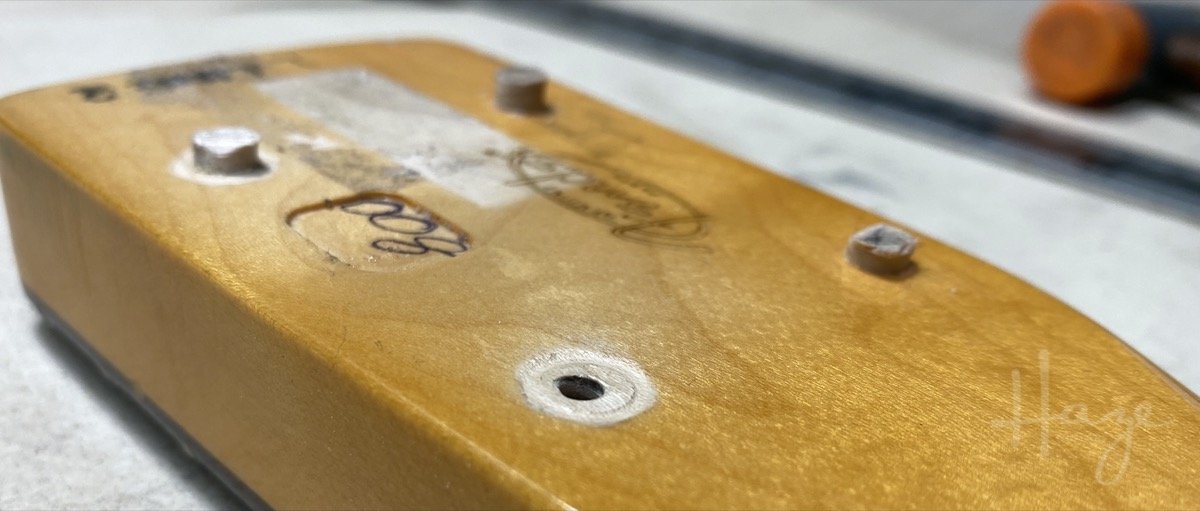
Widen the holes and glue in the plugs. Use a super sharp chisel to cut back the plugs so they're flush with the surface. Then, you can (re)mark your hole positions and drill for the neck screws. The hole nearest in the photo above is the only one that matched. The other three had to be plugged.
Hurrah! We're done with this neck. At least that's what I thought. As it turned out, though, this one had a final annoyance up its sleeve. And it was a doozy. More next time.
Oooh, the suspense.