
Fitting a new bolt-on neck - Part 1
Fitting a new or aftermarket neck to your bolt-on guitar or bass is a common enough job that I thought I’d talk a little about it. I recently had to do this with a Precision Bass and I hit a few problems along the way that are pretty typical. Certainly typical enough that this information should be useful.

First off is the annoying issue of tolerances. You see, even if you’re really careful, measure everything, and order a like-for-like replacement neck from the original builder, it still might not fit.
Grrr. Tolerances are always plus or minus a little. Even if the person spraying the neck or body was a little heavy-handed that day, your new neck might not fit into the neck pocket. That neck heel might be just too darn big to do anything but partially wedge it in there.
Well, don’t just keep wedging it in there. Don’t force things. If something doesn’t fit nicely, regroup before reaching for a mallet.
What’s the non-mallet solution, then?
Well, let’s start at the worst case end of the spectrum. If there’s no way that neck is fitting in that pocket, the best thing to do is to rout the neck pocket a little wider to accommodate it. That’s an easy enough job for a good tech but not something to rush into if you’re not certain what you’re doing. Ideally, you’ll either have a template that matches the neck and you can use that to perfectly guide a router follower-bit. There are other options for routing here and we'll maybe look at some in the future.

At the other end of the spectrum is a neck that’s pretty close. Maybe it’ll squeeze in a ways but bind as it goes. I used to reach for my ‘standing stick’ (above) for this one and that’s still a good way to go if the fit is still pretty tight. It’s just a piece of timber with some sandpaper stuck to it. 120 grit is probably ok but be careful if you feel the finish on the guitar top is thin or likely to chip. Use 220 grit if you reckon it’s needed. It’s pretty easy to keep this flush against the pocket wall and keep things petty straight and true. Keep an eye on the rounded corners but realistically, if you’re removing enough material to affect their shape, you should really be routing with a template.
So, I said I used to use the sanding stick. I actually spotted a great tip from Ted Woodford's YouTube channel recently (Ted’s great—in the unlikely event you don’t know about him, check him out). Ted fitted a neck into the pocket with some carbon paper between them.

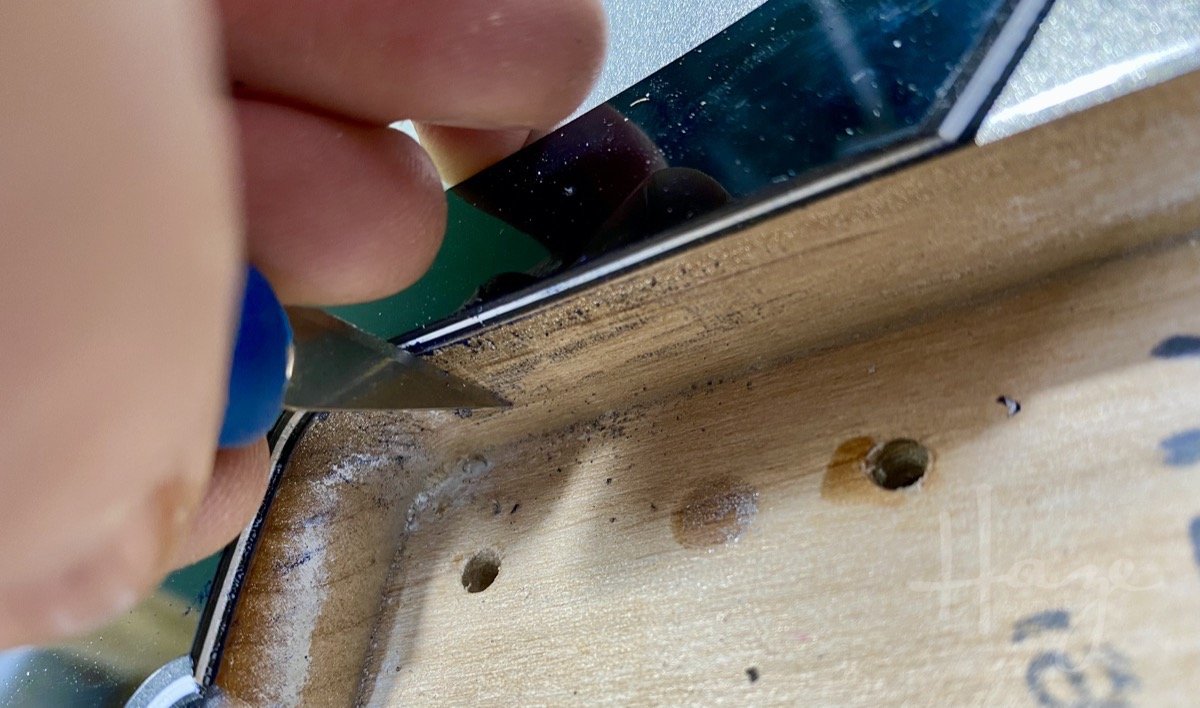
The paper left an ink mark in all the places it was binding up. Then, he went in with a craft knife and just scraped away the ink marks. I know this doesn’t sound like it’ll do much but you’d be surprised at how quickly you’ll progress. And, you’ll do so in a very controlled manner.
Actually, it was a bit of a forehead-slapper when I saw Ted do this. I’d never thought of doing it for this job despite the fact I do exactly the same all the time for fitting dovetail neck joints on acoustic guitars. D’oh! It’s crazy how our brains can sometimes compartmentalise things and fail to make other connections. Stoopid brain!
For slightly tighter fits, the sanding stick is still good but I’ve switched to the carbon-scraping method most of the time now. And, it’s especially good for making sure your neck is properly aligned. If you need to clear up any neck wedging, there’s a risk of misaligning things. You can use a long straight-edge, you run it down the centre of the neck and make sure it hits in the centre of the bridge saddles. If you don't have a straight edge that long, use some thread or thin twine. You can even ‘string’ the top and bottom strings of the instrument with twine to sight along the neck and make sure it’s fitting true. Do this when you begin and repeat as you progress. Then you can finesse a little more scraping on one side or other of the pocket, shifting the neck slightly as you go.

This’ll get you a neck that’s sitting snugly in the pocket. Next time, we’ll make sure it stays there.
Incidentally, the pickguard is something that should be considered here. If the initial fit is just a little too tight, you may be able to ignore the pickguard—it has a little flex and will accommodate small inconsistencies. More than a little and things get a little messy. You can sand it if you’re careful but pickguard edges are really difficult to modify well. They’re unforgiving of any little errors or deviations you make as you sand. Much, much better to rout them but then we’re back to the hassle of templates. So it goes. 🤷♂️