So, How Do You Damage A Hole?
Or, more to the point, how do you repair a hole?
Damaging this was the (relatively) easy part: the owner is a 'big hitter'. I've worked on some of his other guitars and, actually, this one isn't bad. We've caught it reasonably early. This guitar is one of the owner's favourites though and he wants to do something before it disintegrates into tonewood-sawdust.
As it happens, we're in luck on this. The majority of the damage is inside the soundhole rosette. This gives us a natural break-line for a repair. It's much easier to affect a discreet patch with that division between the existing soundboard and some newly-added wood.
With that in mind, I figured the best, and least obtrusive, way to manage this was to replace the entire circle of wood inside the rosette.
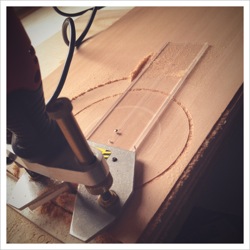
Using a trammel and my Dremel-type router, I can cut an accurate circle to replace the damaged part from a cedar board. Then, carefully, I remove the damaged wood right up to the rosetted edge and from underneath the fingerboard extension. The fit for the new wood was perfect first time (hurrah). All I needed to do was to square off the edge that butts against the shoulder brace.
Time for a little support. Effectively, what I'm doing in the photo on the left, above, is 'extending' the soundhole braces to support the new wood. This area contributes hardly anything to the overall tone of the guitar so I'm not worried about altering its sound by adding reinforcement here.
And, speaking of reinforcement, that's what's happening in the photo on the right. Not only will these shaped pieces of wood help to support that newly glued soundhole edge, they will also strengthen it against future, vicious, pick attacks.
Once it's all glued up, I can shape the edge of the soundhole and round it over. That narrow circle of cedar would have been far to delicate to survive my doing that before it was part of the guitar.
Time for finishing. I'm doing something a little unusual here. I've finished this patched-in soundhole with cyanoacrylate (effectively, Super Glue). I wouldn't normally use CA for something like this but, in this case, it will soak into the wood and harden it. This will help it withstand all that pick-punishment in the future. I can tint it to better match the colour and, once built up and cured, it can be buffed to a shine (or in this case, a satin sheen).
Last step is to add a custom-shaped, clear, mylar pickguard to a wider area of the guitar. Again, this will give a little more protection to the top. I've replaced the existing pickguard on top of that to keep the guitar looking original and give one more barrier against future damage.
acoustic guitar repair ireland


