
How to String a Classical Guitar
Ahh… Classical guitars. The tricky ones.
Classical and flamenco (nylon-string) guitars are the scary ones when you’re starting out with stringing (and they’re still a pain when you’ve been doing it for years).
While it’s generally not necessary to ‘tie’ strings on other instruments, when we’re talking about nylon-stringed instruments, we do need to learn a couple of knots.
Don’t panic, don’t panic. You don’t need a scout’s knot-tying badge. It’s not too bad. Honest.
There are lots of variations in classical stringing methods and I’ve tried plenty of them over the years. What I’ll show you here is the method I’ve been using for a while and I believe it’s the easiest.
TYING NYLON STRINGS AT THE BRIDGE
First up, we need to anchor the string at the bridge.
Take a look at your string. Usually, you’ll find that one end has its windings wrapped a little more loosely—essentially, one end is ‘floppier’ and more flexible. This is the side we’ll tie to the bridge.
The raised, squared part at the rear of the bridge is the ‘tie block’. That’s where we tie our strings on.
TYING THE WOUND STRINGS TO THE CLASSICAL BRIDGE
Starting with the sixth string, tie each wound string as indicated:
NOTE: In the photo, I’m demonstrating with the 4th (G) string. I felt it would be useful to see how the completed ties looked as you stepped through the process.
Photo 1. Pass the flexible end through the appropriate hole in the tie block. Leave about two or three inches (50–75mm) free.
Photo 2. Bring the free string-end up and loop it around the rest of the string from the treble side, before pulling it back towards the end of the guitar.
Photo 3. Now, loop the string-end under itself and, as you begin to take out the slack, make sure the ‘knot’ part stays at the rear of the tie block, (i.e. below the top corner). The photo makes this a little more clear.
Hold the string-end so it can’t move (it’s important it stays at the rear, below the corner of the tie-block) and pull tight on the rest of the string. This should lock it so it stays in position on its own.
TYING THE PLAIN STRINGS TO THE CLASSICAL BRIDGE
The unwound strings are a bit more slippery. While it’s essentially the same procedure, we’ll loop these twice when we’re knotting them.
Pass the end through the hole in the tie block, leaving two or three inches as before.
Bring up the free end, around the string from the treble side and pull back.
Photo 4. Loop the end under itself once
Photo 5. Now, loop the free end under again. This time, keep that second loop behind the tie block (below the corner) like you did above. For the top string, it can sometimes be useful to go for a third loop under to make sure it doesn't slip. It's not always necessary but it's not a bad idea to be safe.
Photo 6. Holding the knot in position, pull tight on the rest of the string to lock it down.
Repeat with the others.
That Looks Nice Tip:
If you keep those string-ends all pointing in the same direction, each will be further tied/clamped down by the next string in line. This doesn’t really make a difference to how secure it is but it does make it look neater.
You can snip off the ends if they're too long for a neat look (not too near the knot or it might slip).
TYING NYLON STRINGS AT THE PEGHEAD/TUNER
This method isn’t all that tricky. It’s very secure but it’s actually one of the easier methods of tying at the tuners. Don't worry—it’s probably harder to describe than it is to actually do.
Turn all your tuners so the hole in each is aligned vertically.
Photo A. Bring your string past the nut and pass it over and around the tuning post.
Insert the string end into the hole from the bottom.
Pull the free end through but don't pull all the slack from the rest of the string. Ideally you'll want to end up with around four or five 'wraps' around the tuning post when you're finished. If you leave approximately two to three inches (50–75mm) of slack in the rest of the string, you should come in with the right number of wraps.
Photo B. Loop the free end over the rest of the string and push it back through the hole in the post.
Photos C and D. Pulling this tight will lock the string nicely into place.
Photo E. Tune it up. Usually, you’ll wind the 6th and 1st strings towards the outside of the headstock while the 5th, 4th, 3rd, and 2nd will wind towards the inside/middle of the headstock. The eagle-eyed reader will notice that I didn’t do my winds in that way here. That’s because I’m an idiot who was paying more attention to taking photos than to stringing a guitar properly. Don’t be like me. 😄
Keep some tension on the string as you wind it and try to keep the coils neat.
Snip off the excess string-end, but not too near to the hole.
Repeat with the others.
The alternative tuner tie method
The above method is my preference as it’s a bit easier to do and pretty secure. However, it does require that the string hole in the tuner shaft be large enough to accommodate two string thicknesses (through in one direction and back out in the other). That’s not always the case so here’s an alternative. This is probably a more ‘traditional’ tie too.
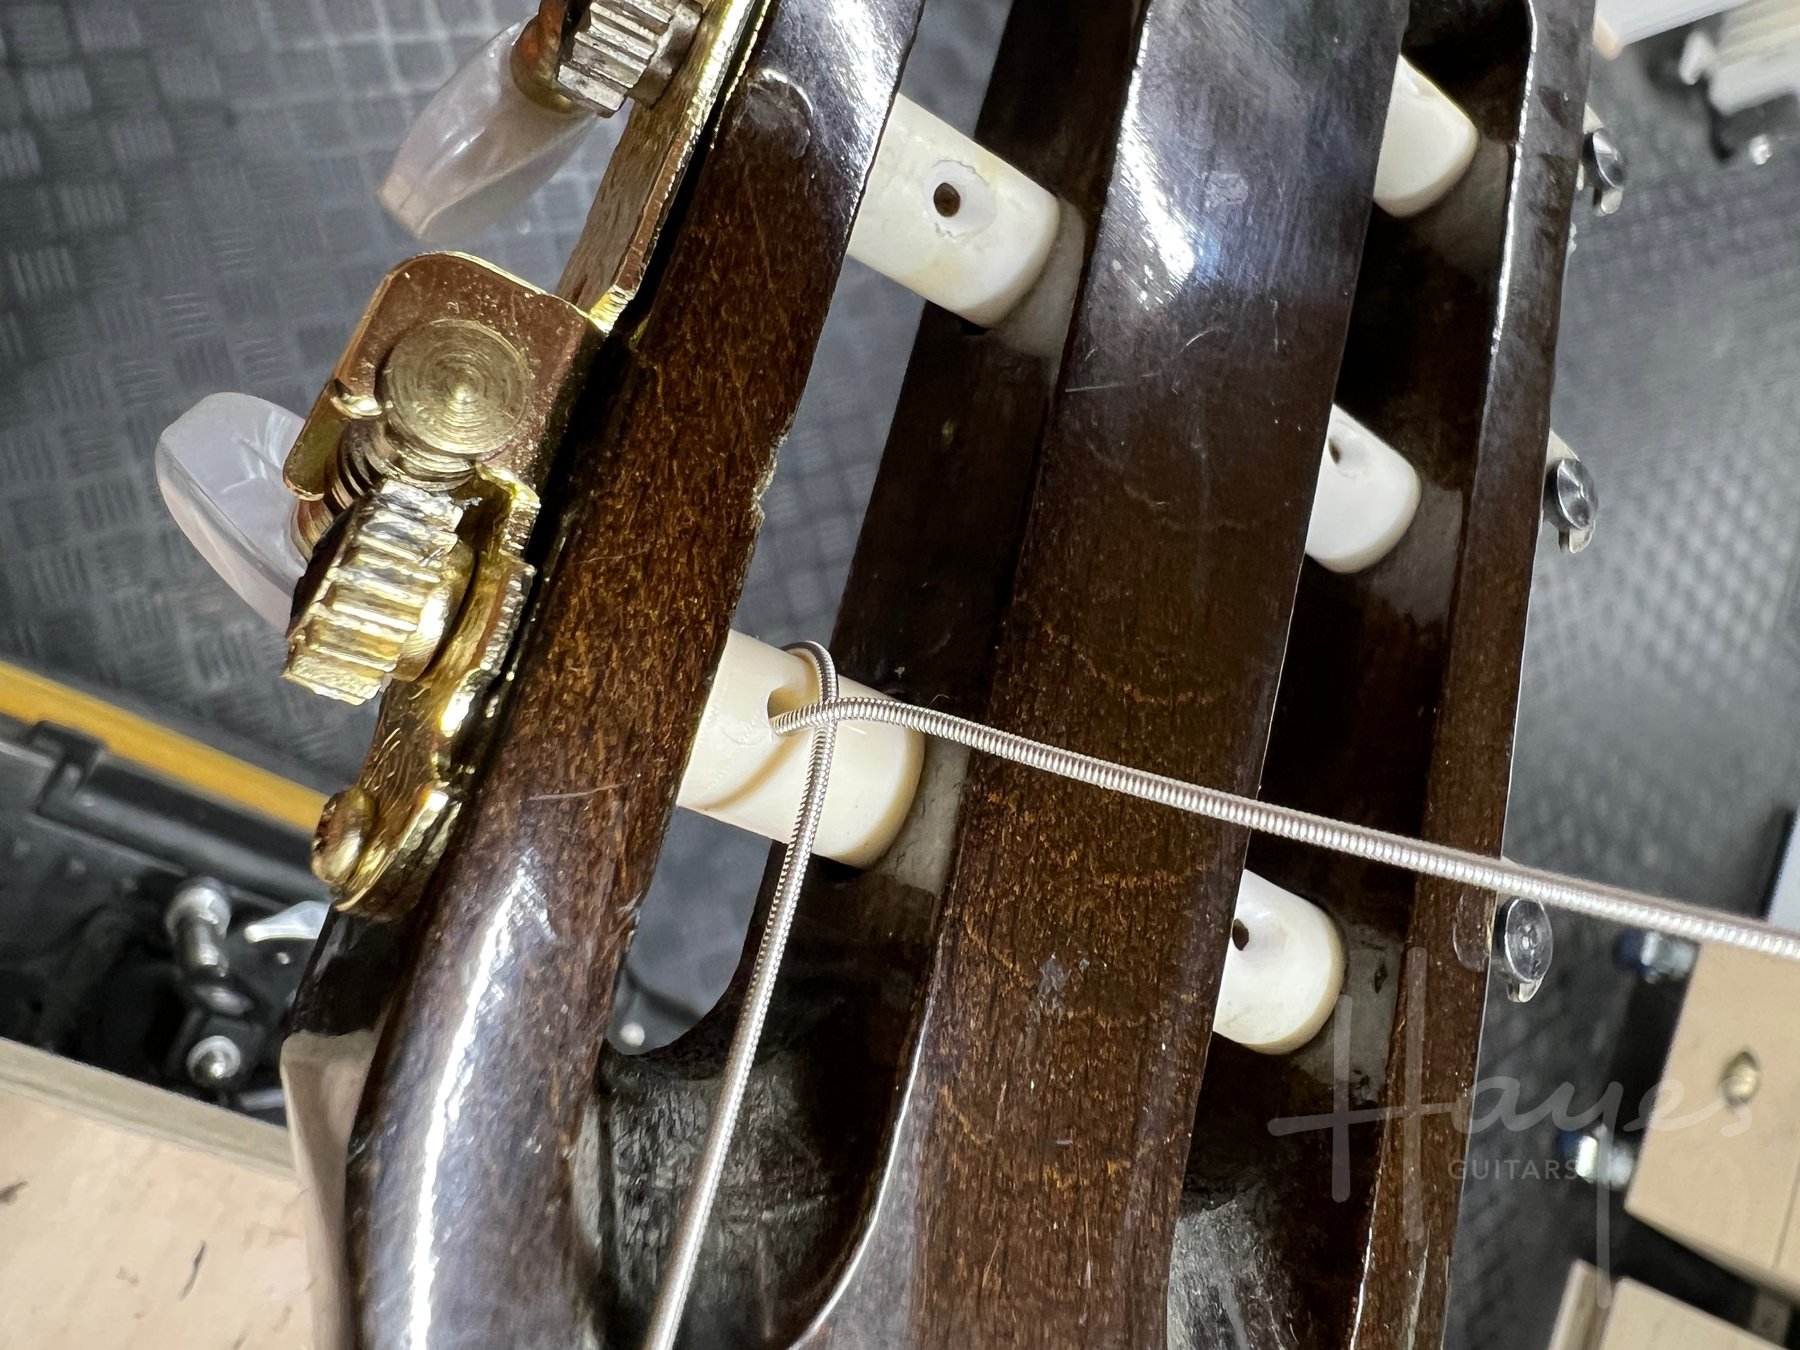
Photo Alt A
Starting with Photo Alt A — and starting with the bottom (6th) string, wrap the string over the tuner shaft and feed it back up through the hole. Again, leave sufficient slack over the fingerboard to allow for a few winds.
Since we generally wind the bottom string outwards towards the edge of the headstock, the free end of the string is on that side. This is important.
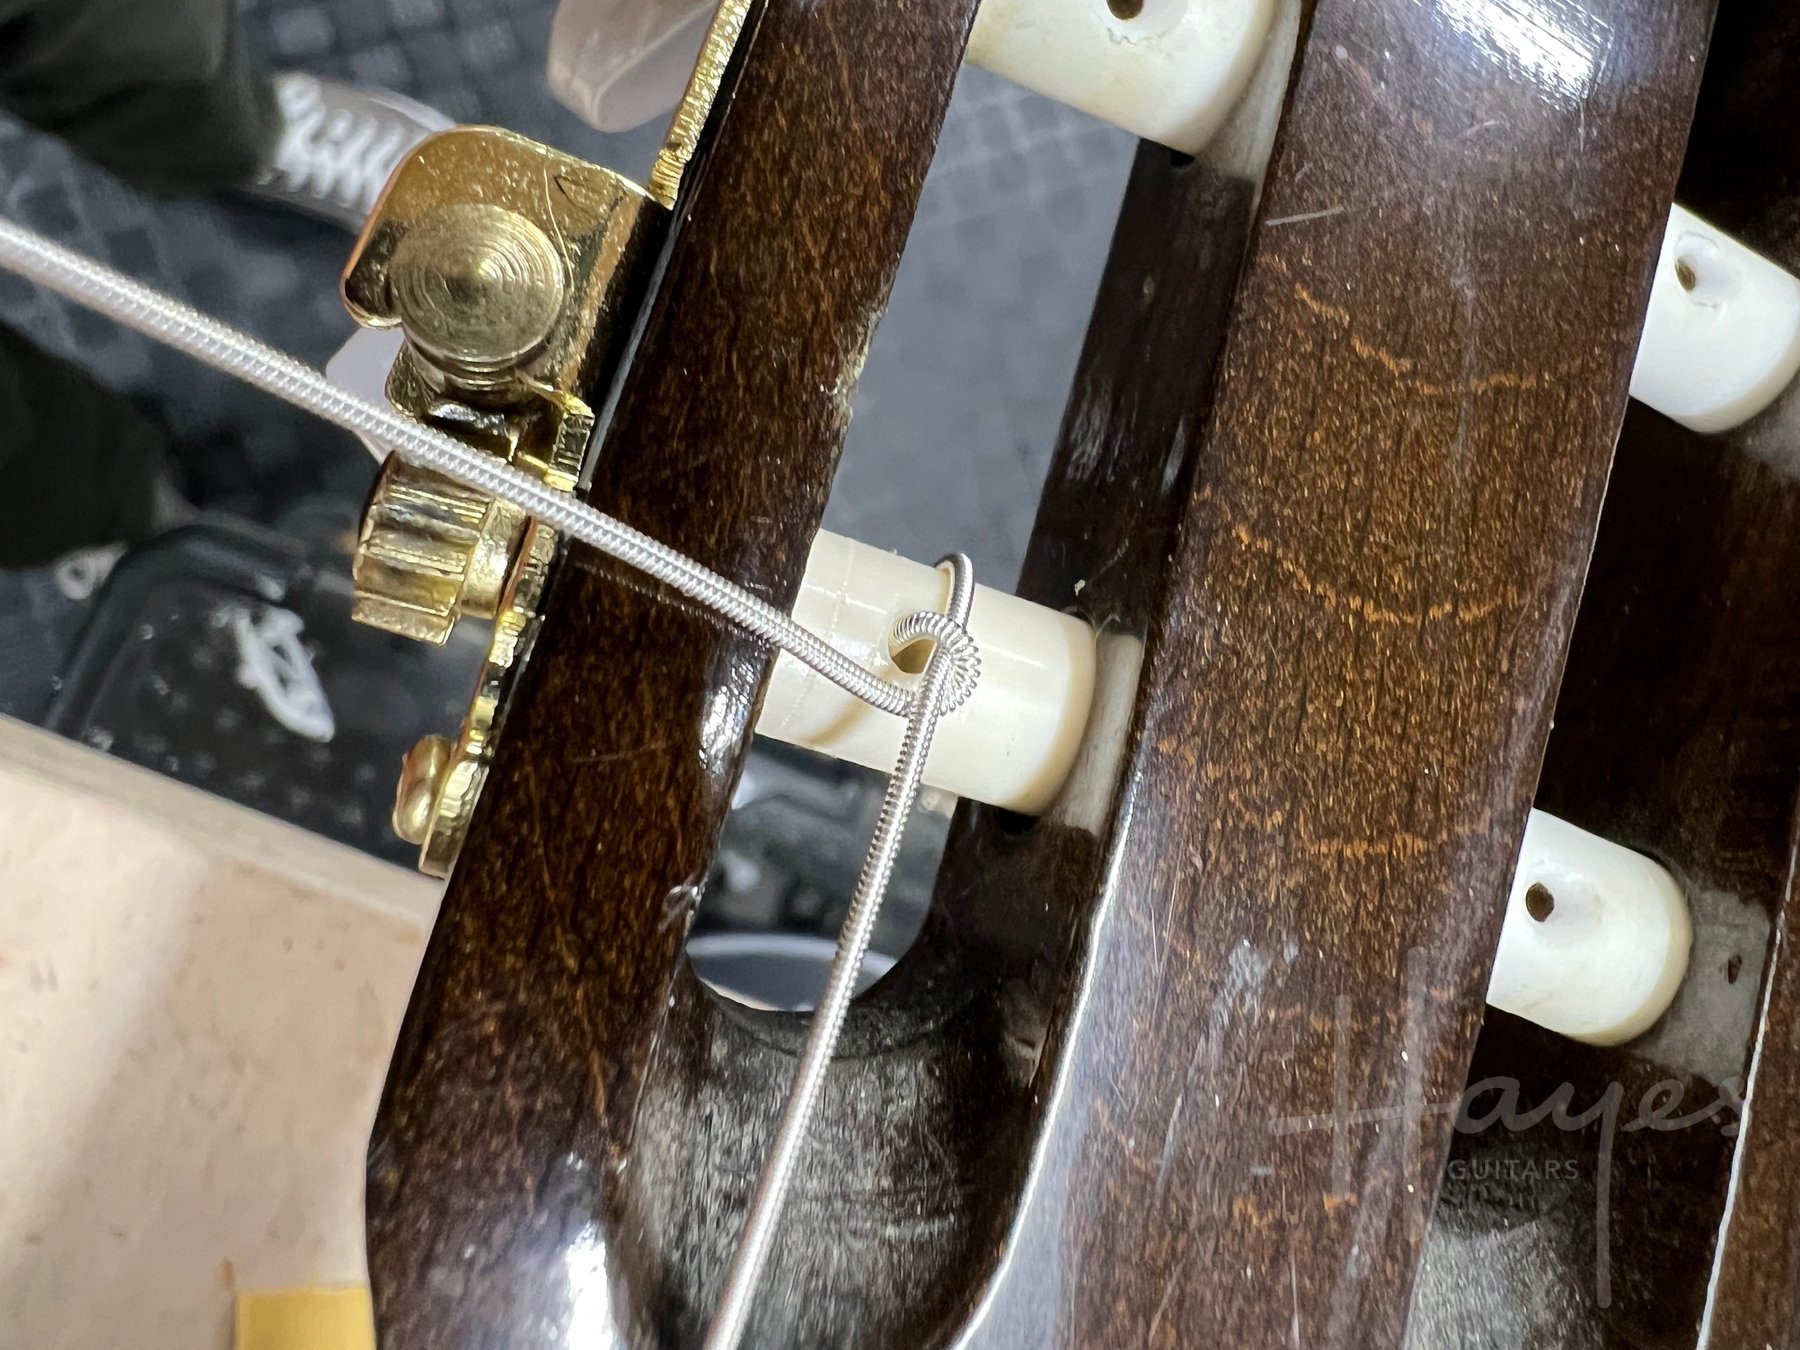
Photo Alt B
Now, take the free end and wrap it around the rest of the string as shown in Photo Alt B. The free end should point towards the outside of the headstock here.
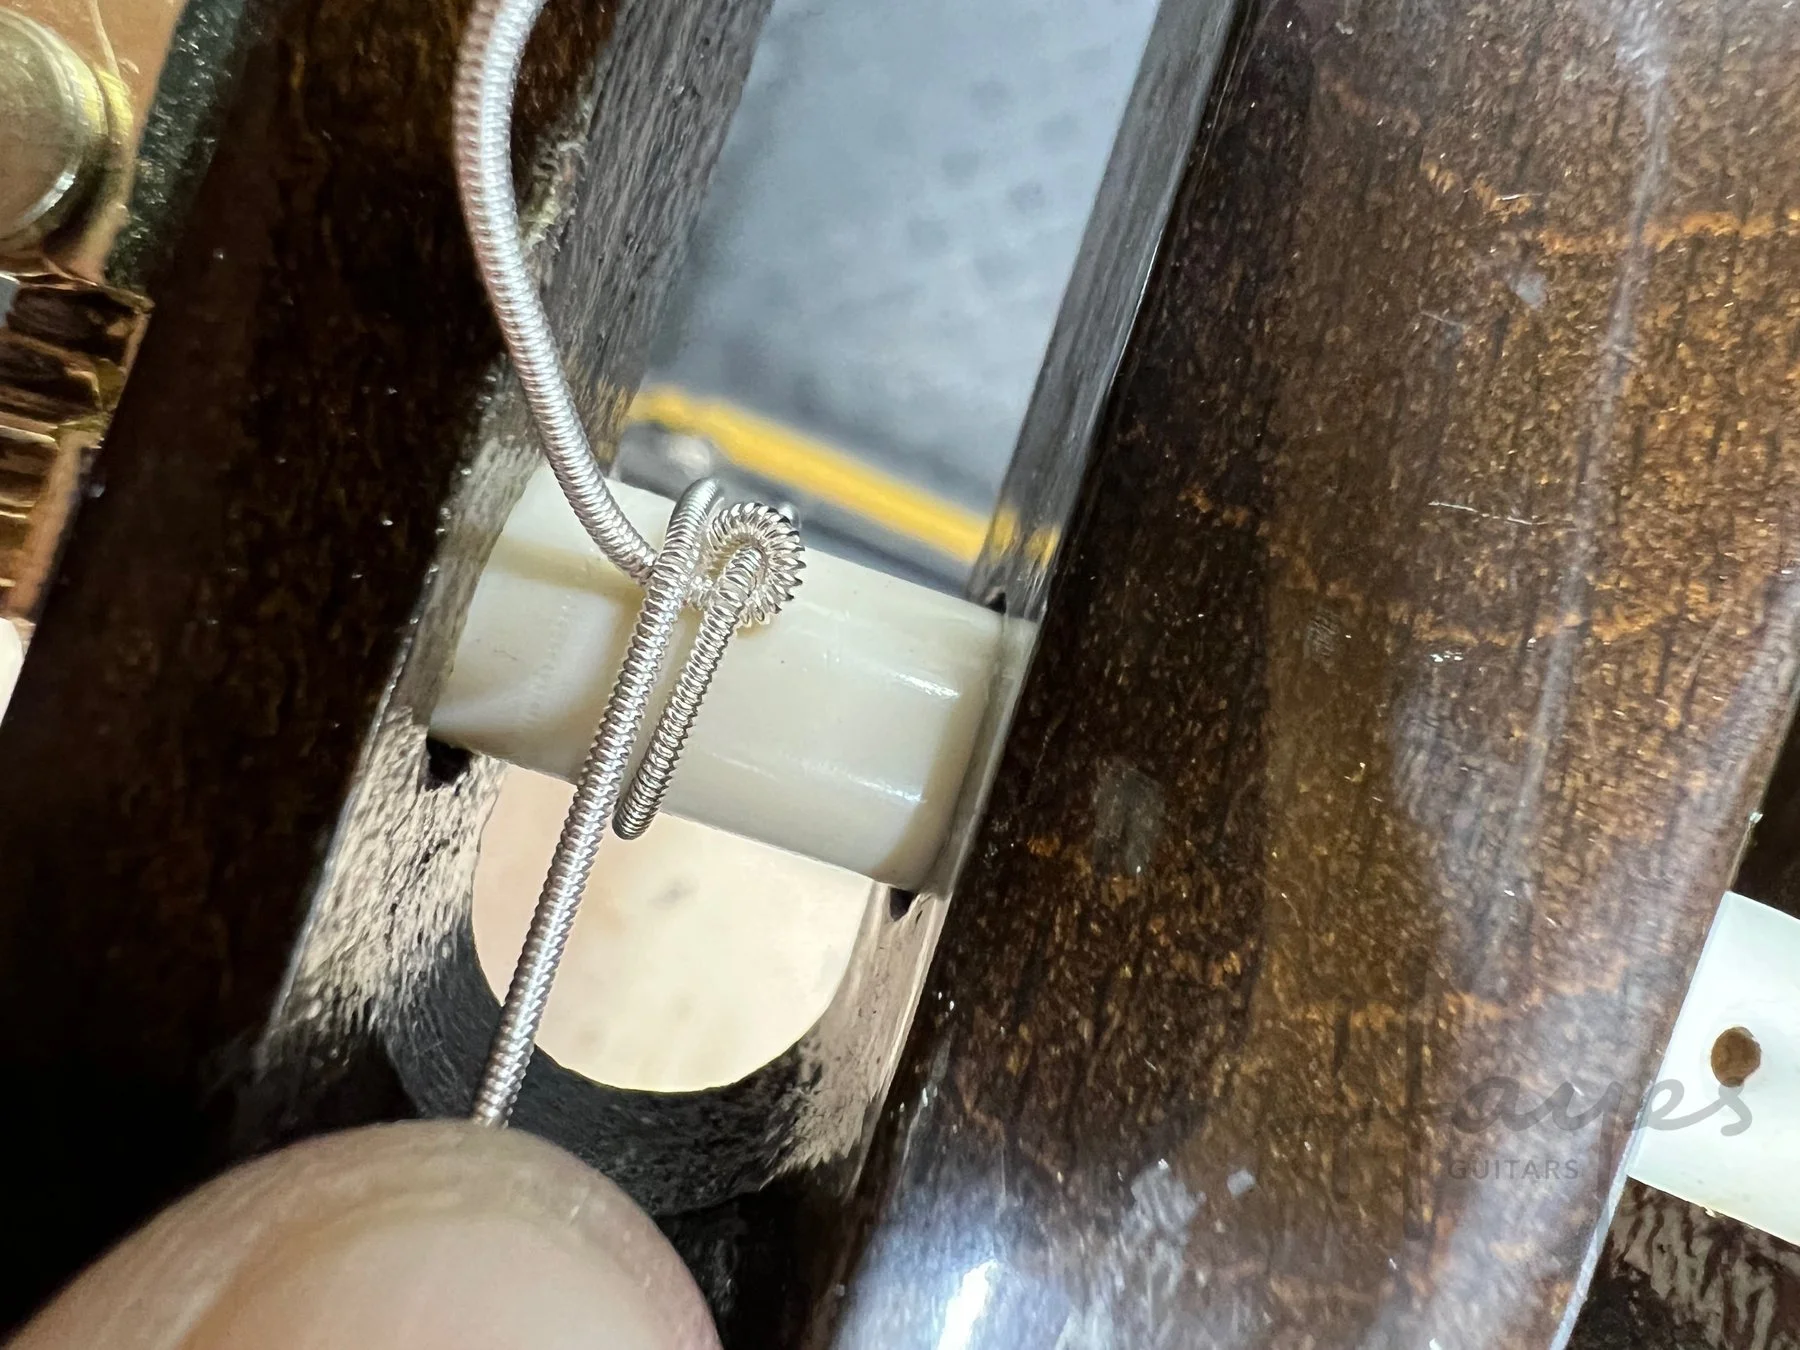
Photo Alt C
Start winding the string onto the tuner at this point. When you’ve completed a full rotation, wind over the free string-end. Because this is the 6th string, we’re winding towards the outside of the headstock and, since the free end was pointing in that direction, we can wind over it. Continue winding over the free end with subsequent wraps and, when you’re up to pitch, you can snip the end off close to the wraps.
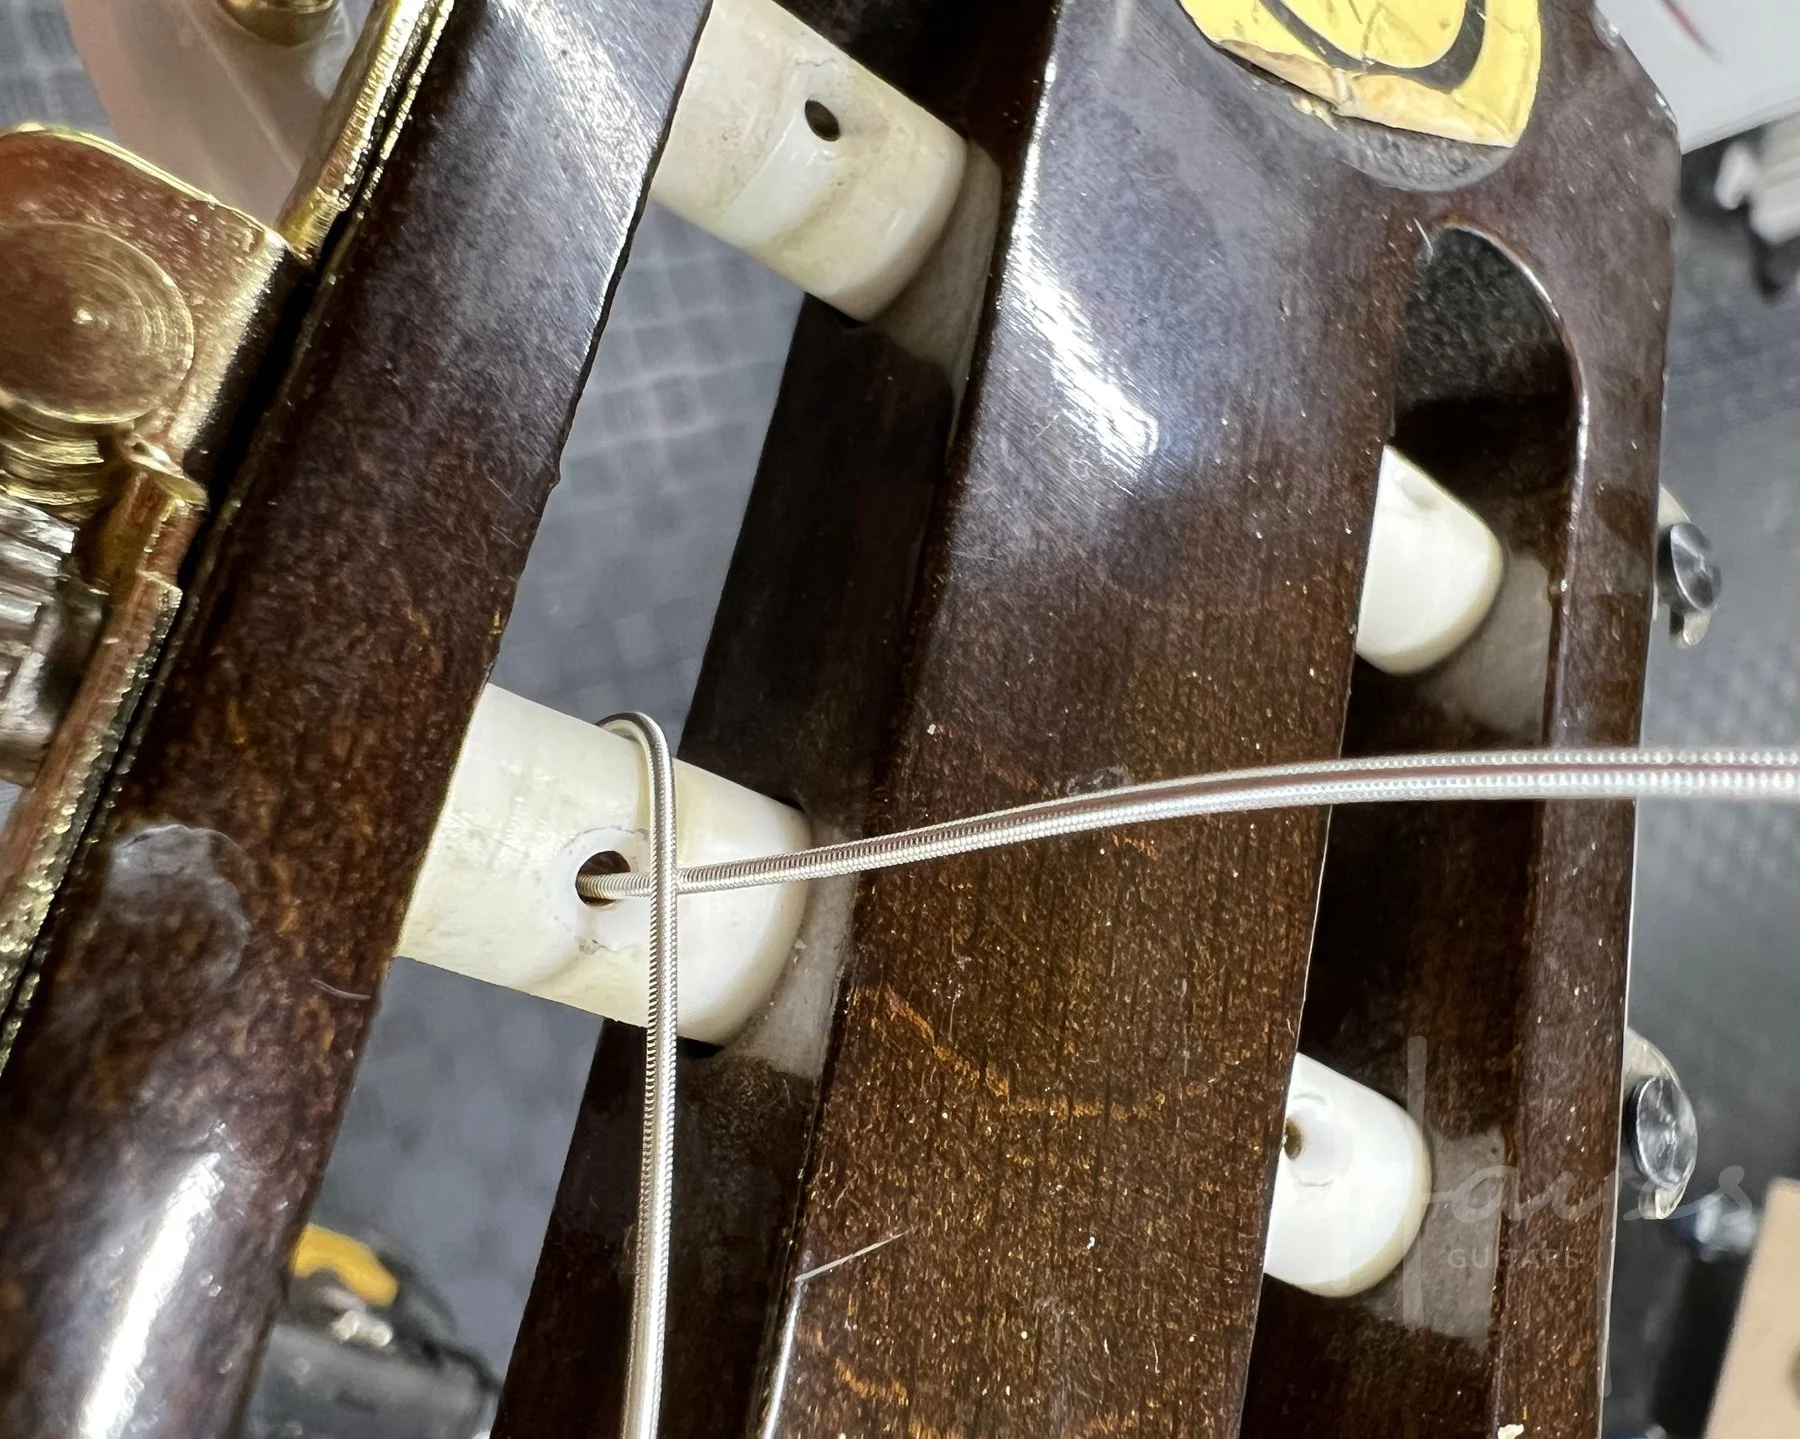
Photo Alt D
Now let’s move on to the 5th string. Here, we’re going to be winding the string towards the centre of the headstock so the free end of the string starts on that side. This is the opposite to the 6th string we’ve just done.
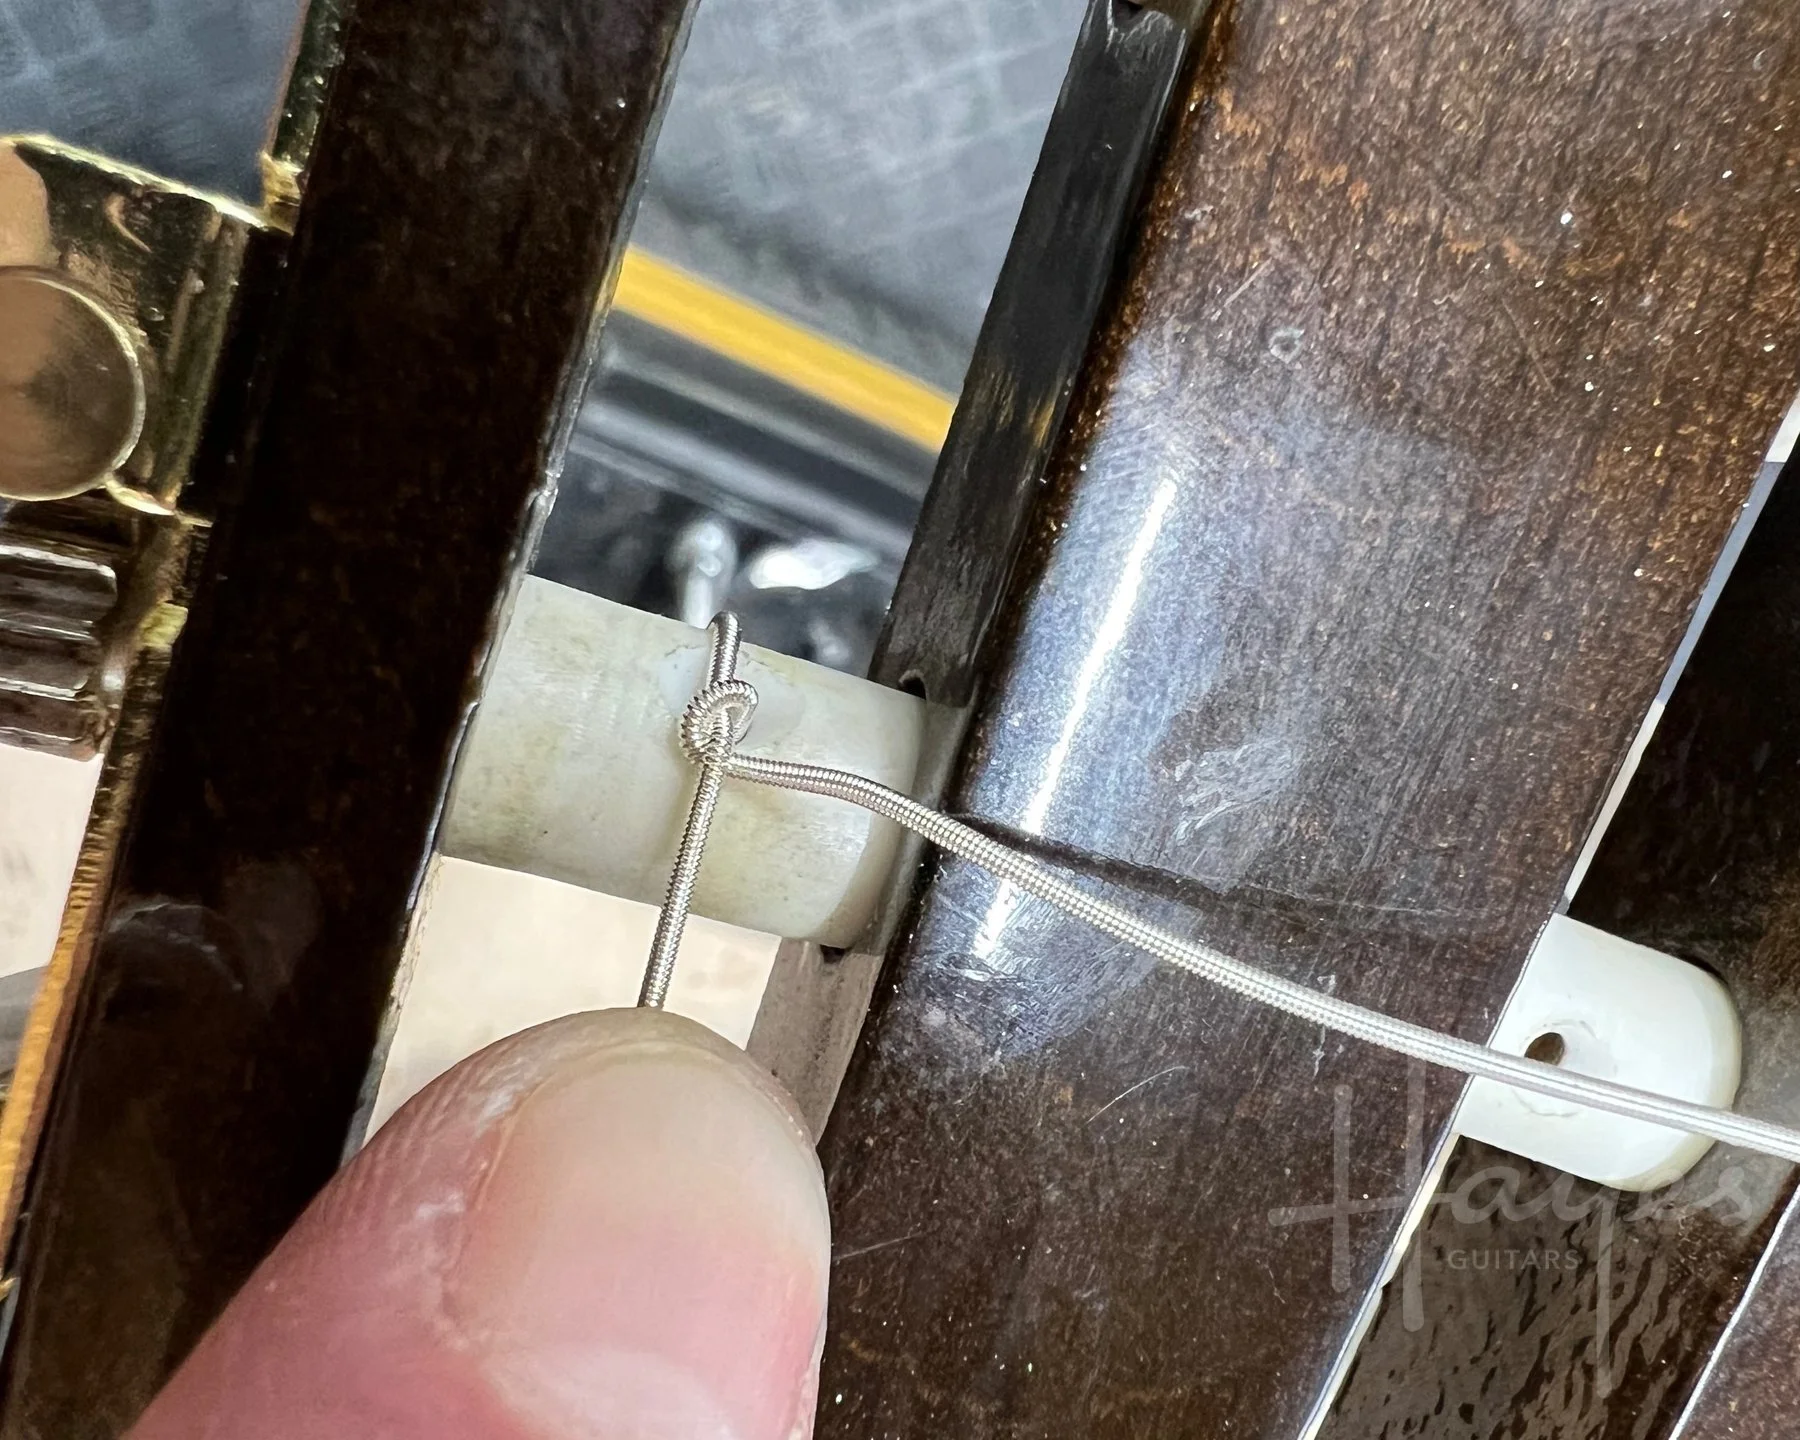
Photo Alt E
That’s so that, when we wrap the free end around the rest of the string, this time the free end points towards the middle of the headstock.
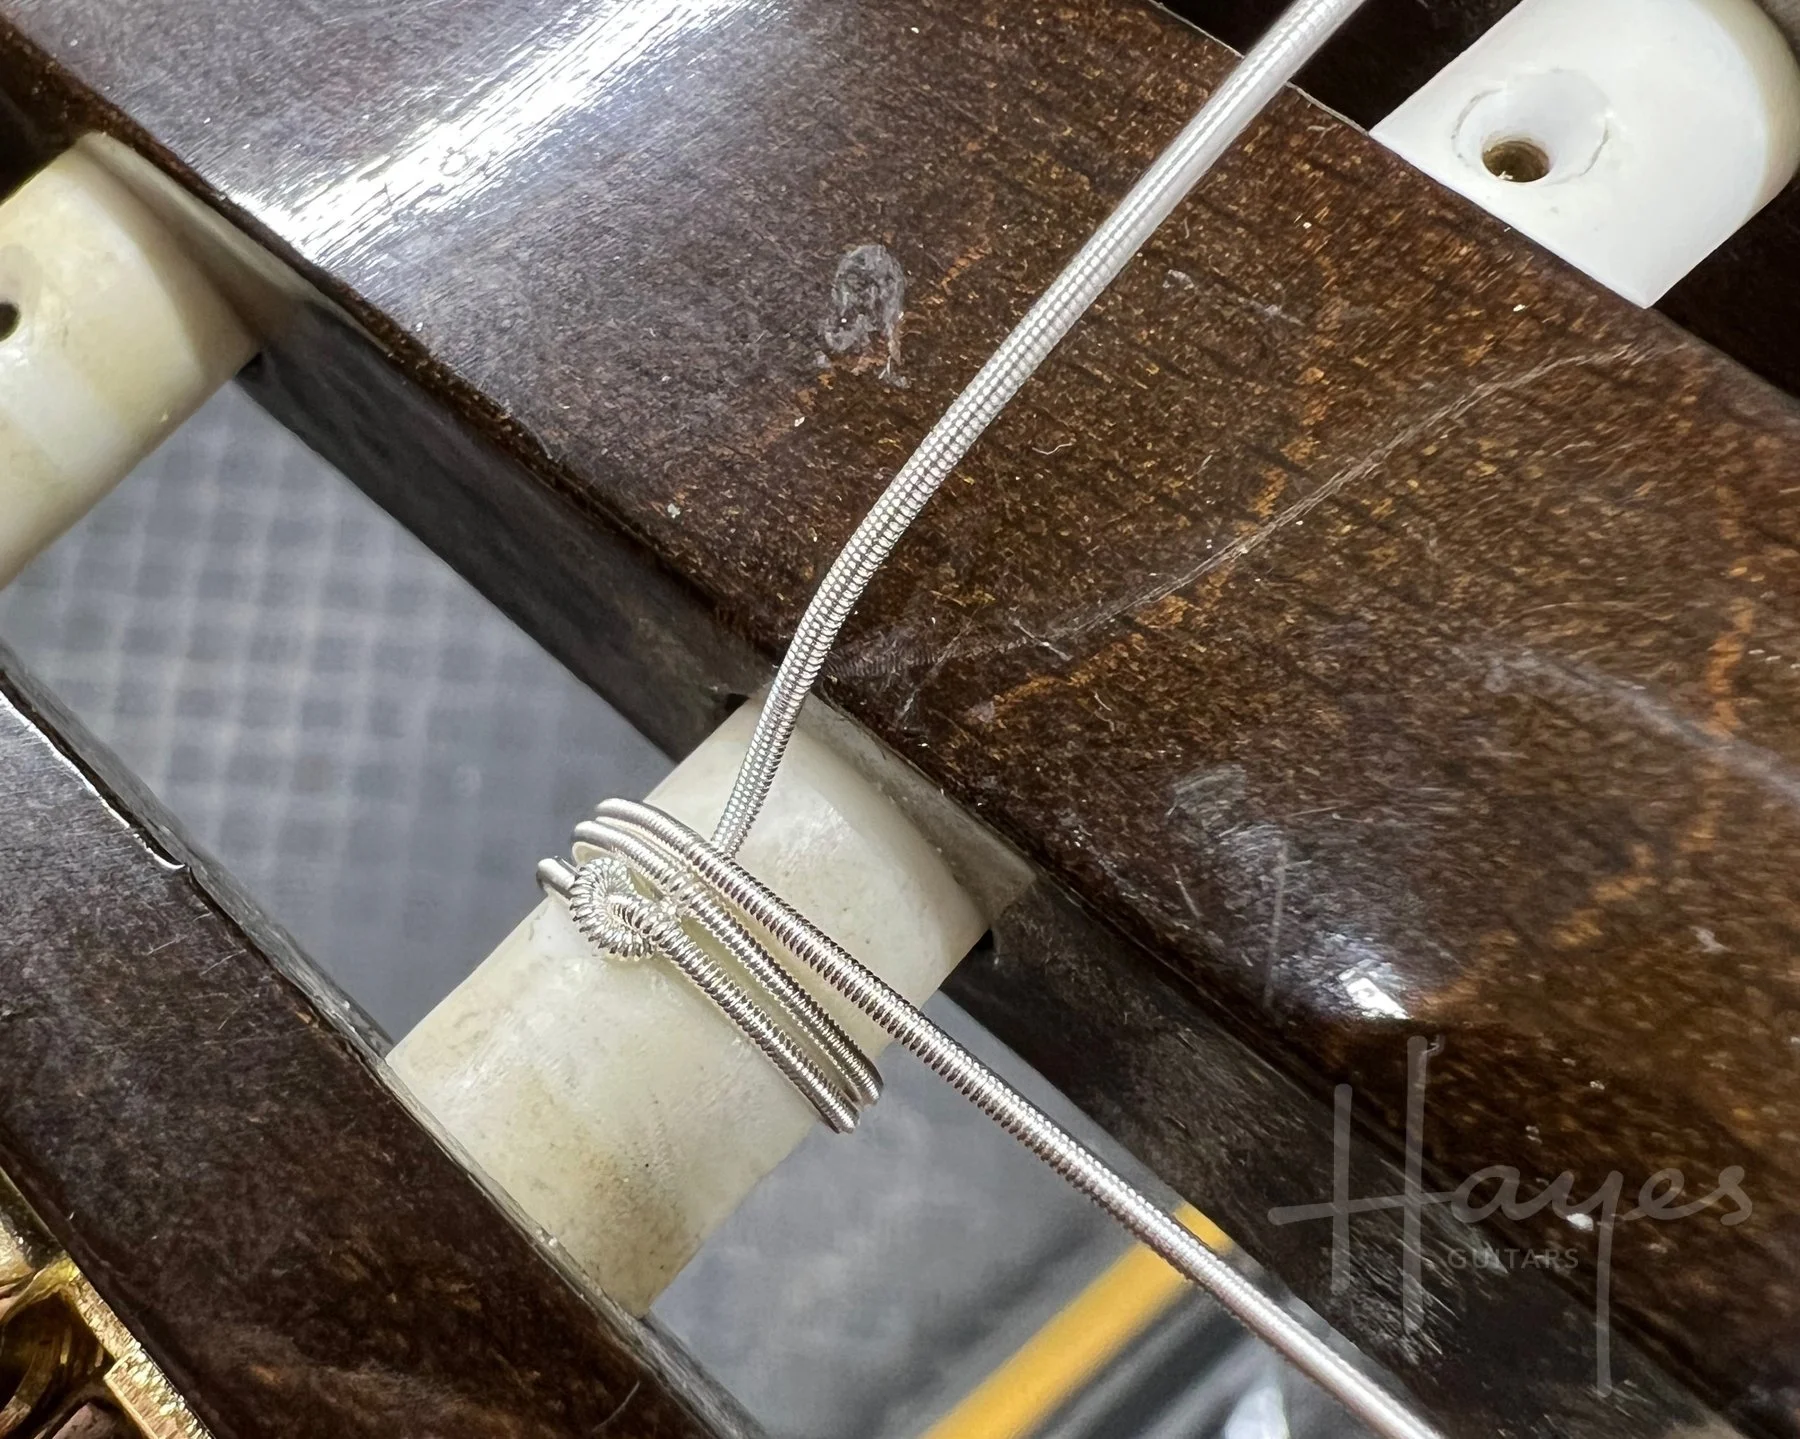
Photo Alt F
And, that means that, as we wind this string, the wraps go towards the middle of the headstock too, trapping the free end and preventing slippage as they go.
Repeat for the other strings. Remember that, usually, the 1st and 6th strings wind towards the outside of the headstock and the others towards the middle.
CONSIDERATIONS on tuning
It can take a little while for nylon strings to settle in. Tuning will definitely slip flat for a while as they stretch in.
I’ve been ok with giving strings a gentle stretch to help them bed in but I have read Frank Ford recommend against that for classicals (and Frank can generally be trusted). If you choose to stretch, make sure it’s very gentle to avoid stressing or deforming areas of the strings — they’re not as tough as steel strings. I’ve come to accept that it might be better to play it safe and accept that the universe demands patience of the classical guitar re-stringer.
And, at least you get to do the old joke:
When your classical strings stay in tune, it’s probably time to change your strings. 😄