Martin Neck Reset - Easy
About a month ago, I had a spate of neck resets that fought and fought. They just didn't want to cooperate. I'll write something about one of these in a little while but, for the sake of my sanity, I'd like to remind myself that, sometimes, they go well.
If you want a recap on why we reset necks and what's involved, check out my neck reset primer
Getting the neck off
If you’ve a bolt-on neck, life is considerably less messy. If you’ve a dovetail, glued-in neck, well, then we need to break out the steamer. But first, the fingerboard extension.
I apply heat to the fingerboard (carefully, obviously). In this case I’m using a heating blanket. I used to use a shaped metal block that was heated separately and then popped in place but the blanket makes things much more easy. Some poking around with spatulas helps loosen the glue. Often, it'll take a few heating/poking sessions to get things freed up.
Then the fun begins. Steam.
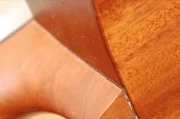
I remove a fret and drill a little hole, through the slot, into the dovetail cavity. There’s usually a small gap at the back. Once I have access in here, I fire up the steamer and begin to inject steam, through a nozzle, into the cavity. As I do, the hot steam will gradually soften the dovetail glue.
How much steam and how often it's applied varies from guitar to guitar but it's best to use as little as possible. There's quite a bit of wiggling and wrestling with a guitar as I try to get the glue to give up its grip. That wooden contraption around the guitar helps a lot. It provides some 'upward' pressure to help encourage the neck to move out of the dovetail as I wrestle with it. You get a feel for it—when to go with more steam, when to wiggle and, after a while…
It pops out. Brilliant.
Setting the neck
The neck angle is altered by taking a 'wedge' of wood off the heel. The image shows an exaggerated view of this—the green section is removed so that when the neck is reattached, it tilts back.
It's really important not to take wood off the pointy bit of that wedge as doing so would move the neck closer to the bridge and actually alter the scale-length, throwing your intonation all out of whack.
Chisels and sanding 'sticks' get most of the wood off. When I've taken off enough to get me close to where I want to be, I finish off by moving to strips of sandpaper. Using then as shown lets me take off the last, smaller, amount of wood but also lets me get a good fit between neck and body. Taking more off one side or the other, during this stage, also allows me to adjust the side-to-side fit so the neck sits properly on the centre-line.
As I proceed, I'm constantly checking the set-angle (by sighting along the board), the centre-line set (by using a long straight-edge along the neck), and the fit between neck-heel and guitar-sides.
Putting it all back together
When everything's right, it's time to reassemble. Generally, the dovetail joint needs to be shimmed as our angle-changes will have altered the way the joint sits together. A couple of test-fits get me where I want to be and then it's time to heat up the glue-pot. In usual Martin-style, the glue goes only on the dovetail joint and under the fingerboard. The heel and body do not get glued on a Martin. This is one of the reasons Martin resets tend to be a little easier.
A properly fitting dovetail pulls itself together. A clamp for the joint and one for the fingerboard is all I need.
I like to leave things overnight for the glue to cure—probably overkill but it makes me feel safer. Clamps off and I make a little rosewood plug to fill the hole I drilled earlier. Once that's glued in, I can re-cut the fret-slot through the plug and reinstall the original fret.
Some neck-sets require a full refret afterwards but we're good on this one. Only minimal fret-work is is needed. Also, Martins don't usually need any finish touch-up so this guitar's playing again—with a new saddle and a comfortable action—in no time at all.
Textbook. Nice.