
Neck Resets: Taylor Guitars
Sooo… Way back in the mists of time, you’ll remember I started a series of posts discussing acoustic guitar neck resets. It just finished off last week. Weird thing is, I did that whole, giant neck reset series almost as an aside. You see, I’d begun by writing something on the cleverness of Taylor Guitars’ neck resetting trickery. It occurred to me, though, that it’d make sense to talk a little about regular neck resets first.
A “little” 😉
Nine posts later, I get back around to my original point. But, if you think that’s an impressive conversational tangent, you should come for a beer with me some day. You’re buying, though.

Over the last while, we’ve discussed how an acoustic guitar neck is removed from the body and modified to fit back at a different angle. We’ve seen how it’s necessary to steam or heat the glued-in necks to release them. Well, bolt-on neck guitars are a bit easier.
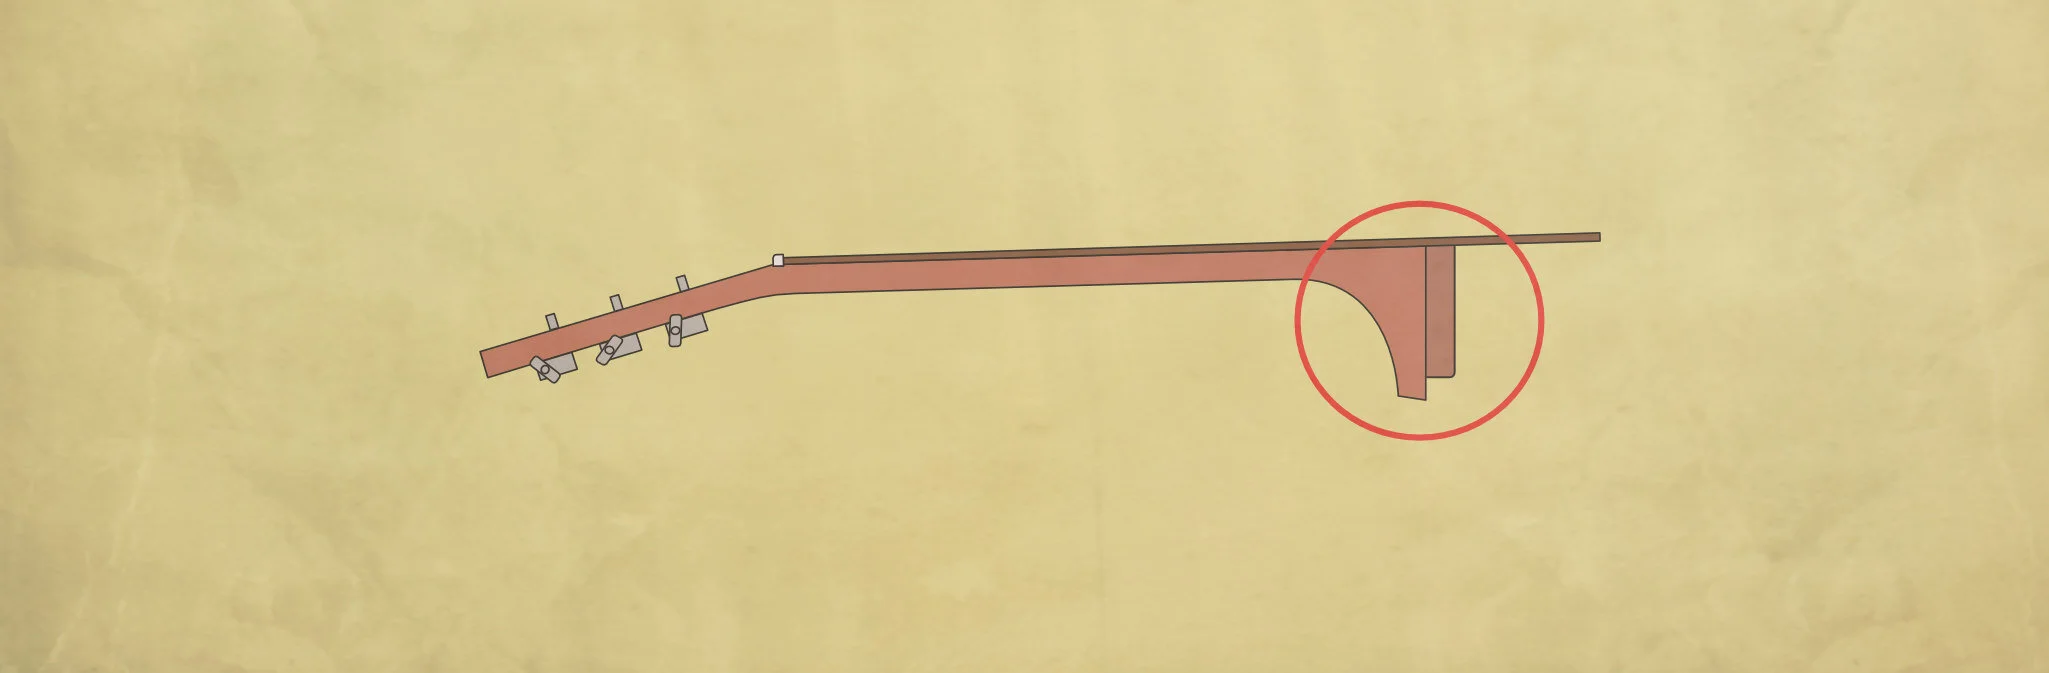
Usually it’s just a matter of loosening one or two bolts in the neck block to free the heel/joint from the guitar body. In most cases, the fingerboard extension is glued to the guitar top in the ‘traditional’ manner and that requires heating so the glue lets go. Some instruments have this extension bolted to the top instead of glued. A few even have corresponding ‘support’ extension of the neck underneath the fingerboard extension.
Bolt-on necks generally reduce a lot of the effort in neck resets. Steaming or heating a neck off is a step most repairers will happily skip. The remainder of the reset generally follows pretty similar steps, though, and involves the same modifications to the heel.
Until Taylor decided they’d rather avoid all that.
Taylor NT Neck
Back in 1999, Taylor introduced their NT Neck. I think the ‘NT’ stood for New Technology but nobody ever seems to use that unabbreviated name. In fact, as it’s a standard feature across almost all the range, it’s probably fair to say that this is just the Taylor neck now.
The NT neck included a neck extension under the fingerboard extension so he fingerboard is supported almost all the way to the end. While not completely novel, that's different to the majority of prior acoustic guitar necks which had the fingerboard unsupported past the neck-body joint. This extra support helps the neck better cope with environmental changes. The body may change due to humidity or dryness but the neck remains less impacted.
Great. That’s not the best part, though. Let’s talk about how the neck attaches to the body.
The neck block (the part inside the guitar body that mates with and supports the neck) is actually made in a sort of inverted L-shape (something like ⎾ when viewed from the side). There’s the usual acoustic guitar neck block and a support that extends out under the fingerboard extension.
Outside, on the guitar body, there is an incredibly accurately machined mortise/slot in the side that accepts the neck heel and another in the top that accepts the fingerboard extension with its support ‘paddle’.
Ok, so we have some great woodworking with super-tight tolerances but we’re still not at the really clever part.

Taylor heel and extension shims and their receptacles
The extension and heel mortises in the body each have a further shallow slot. These slots accept wooden shims.
A ‘default’ shim in each will allow the neck to attach to the body at a zero degree angle — the neck heel will be at right angles to the guitar top.
But Taylor have a range of shims. Each of these shims has one end that is a little thicker. This gives a range of, increasingly wedge-shaped, shims. You see where we’re going with this?
By adding a larger-sized shim in the extension pocket and a smaller one in the neck heel pocket, we can angle the neck back. We’ve effectively performed a neck reset just by unbolting a neck and swapping a couple of shims.
Minds blown. Games changed.
I can’t move on without gushing a little about the precision woodworking that we’re talking about here. The fit between heel, fingerboard, and guitar is impressive but the accuracy of these shims is incredible. Each shim sees one edge change thickness by .010” (.25mm).
There’s a corresponding heel shim for every extension shim (and it’s important to match them). It’s really easy to dial in the neck set angle you want.
So easy, in fact, that if you want to lower the guitar’s action, Taylor recommend lowering the saddle only for minor adjustments. Should you need to lower your action by more than a little, it’s a relatively straightforward job to change the neck angle instead of modifying the saddle (and maybe making it lower than optimal).
What Taylor did with this neck design was to make a guitar that’s built with its future in mind. The neck can be adjusted to get a great action without ending up with a saddle that’s too low. It can be adjusted to account for something like an inadvertent tall or short bridge (although that’s not typically an issue with these). And, as the guitar ages and the tension takes a toll, the neck can be reset without the need to spend a fortune to do so. It’s even feasible to alter neck set-angle for seasonal setup changes if that’s an issue for you.
Kudos to the Taylor folks. I’m repeatedly impressed with their impressive R&D, their precision, and their consistency. Two thumbs-up (or is that two thumbs-ups?)
A round-up of this neck reset series


This article written by Gerry Hayes and first published at hazeguitars.com


The final touches. Everything’s back together and the reset is done. Just a few last considerations.