
Neck Resets 6: The 'Gross' Reset
Continuing the neck reset journey. We eventually got the neck separated from the guitar. We figured out how much needs to be removed from the heel. Now we need to start working to reset the angle it attaches to the body. I'm calling this the 'gross' reset as it's the initial, 'roughing-in' portion of the job.

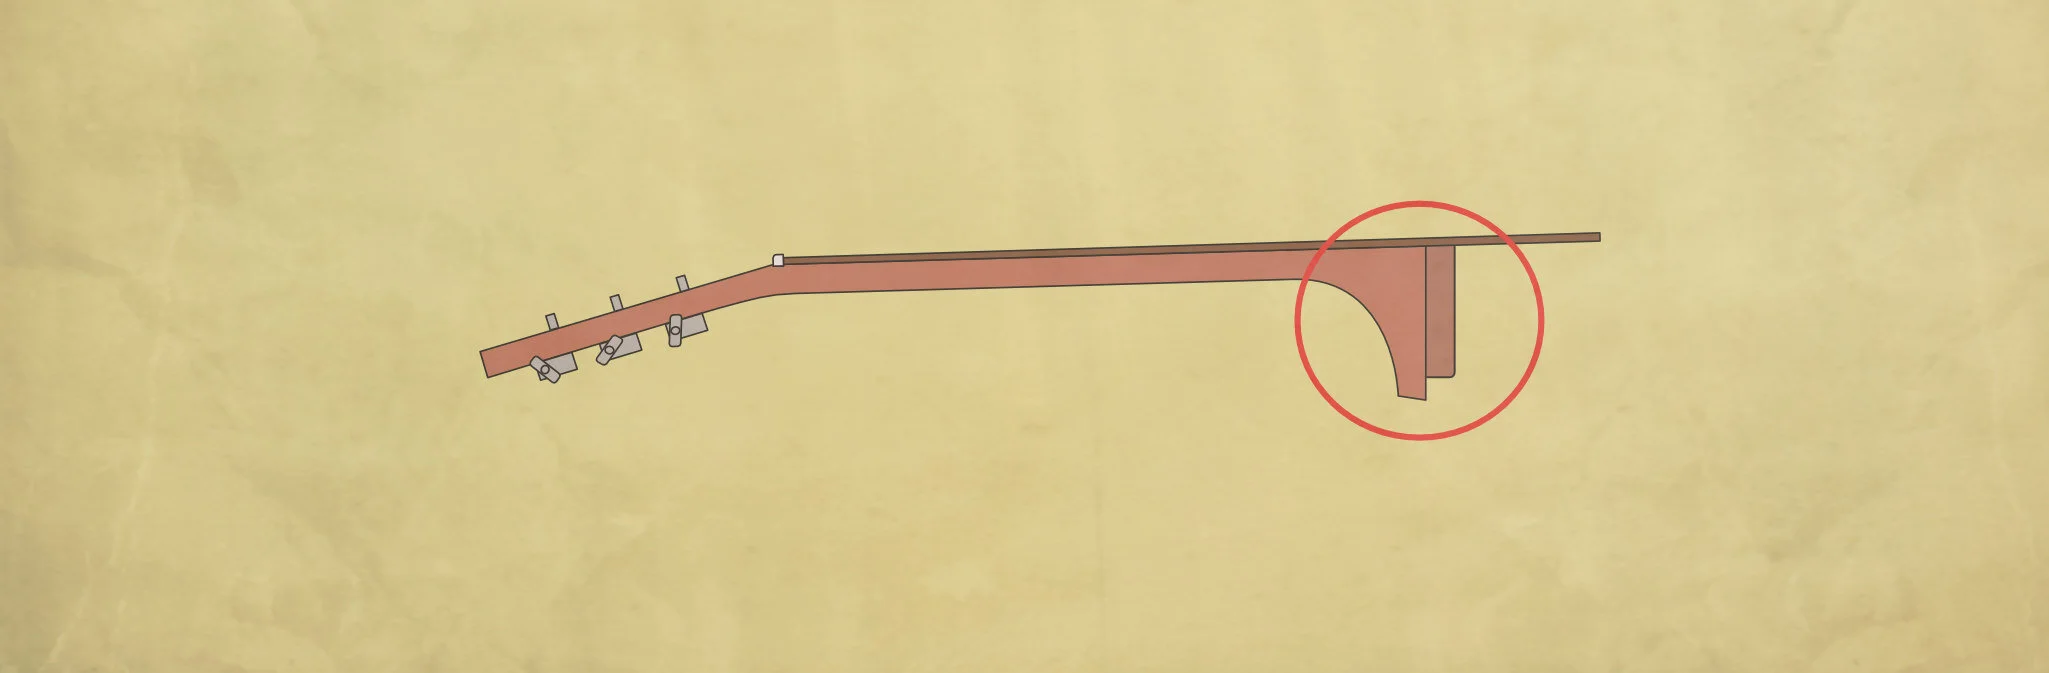
acoustic guitar neck resets - the initial, ‘gross’ reset portion of the work
Remembering back to our theory part, this means ‘pivoting’ the neck at point P. That’s the point at the fingerboard meets the body (side and top).
To do this, we need to remove a wedge-shaped piece of wood from the neck heel. Removing wood at the bottom and tapering the ‘removal’ towards that fingerboard-body point (P) will allow the neck to reconnect at an increased back angle.
As we approach this job there’s one incredibly vital thing to remember. You don’t want point P to move. Not at all. That wedge has to taper so that point P doesn’t see any material removed. If that happens, point P shifts closer to the bridge saddle. That takes the whole fingerboard with it and that means the frets shift relative to the saddle. This can screw up your intonation. Point P — the fingerboard-body intersection - must not move. The neck pivots around this point but it doesn’t move. I may have mentioned that.
We start with what I’ll call the ‘gross’ reset. This is where we take off the bulk of our material. If you’ve only got a very slight angle adjustment required, you can probably skip this part and move straight to the ‘fine’ adjustments of the reset.
We did our sums earlier to tell us how much wood to remove from the bottom of the heel — the thick end of that wedge shape. However, don’t go crazy and try to remove all of that at once. After this gross reset part, there will typically be quite a bit of fine tuning required to dial in the set angle, the side-to-side angle, and the ‘fit’ to the guitar sides. If you hack off everything at the start, you’ll end up going too far as you fine tune. Then you’ve got an ‘over-set’ neck and you don’t want that.
So, when we mark our calculated measurement on the neck heel, I’d recommend only marking about ⅔ of that value (or mark it all and remember not to cut all the way there in the beginning).
I typically measure out with callipers and mark the cut-line with some masking tape (unless the neck has a very checked and flaky finish) in which case I tend to just eyeball things.
A quick tip before we go on. It’s helpful to slightly dish the ‘face’ of the neck heel. By ‘face’, I’m talking about the section that butts directly against the guitar sides when assembled. And, by ’dish’ I mean cut back the interior sections leaving just a narrow ‘shelf’ all around that will contact the guitar sides.
The only neck I have to hand right now is a bolt-on neck blank but that'll do fine to illustrate this. The shaded section in the image above is what I'm talking about dishing or recessing.
Let me explain a little more. Using a chisel, you can excavate the internal portion of the heel face as I've started to do above. Then, when you’re cutting and sanding the heel later, the remaining shelf requires less effort to work. This also gives a more accurate end result. Keep an eye on this dished section as you work — it’ll get smaller and the shelf will grow wider as you adjust the heel angle. Go back and re-dish if needed.
OK. On to resetting.
If you’ve a lot of material to remove, you could begin with a very sharp chisel. I often do but you need to be happy you're not going to accidentally go awry. However, after chiselling you’ll move to some sanding anyway, so it’s probably safer to begin there for most jobs. It’ll take a little longer but there’ll be less risk involved. For sanding, you need a complicated tool called a Neck Reset Sanding Stick. Nah, it’s just a bit of wood. You want something around ¾” to an inch wide (around 20-25mm) and maybe 6-8” long (150-200mm). The important thing is that it be relatively stiff and have a flat face where you can stick some sandpaper. 120 grit is good. Do make sure that face is flat, though. You don't want to sand some weird arc into the heel because your sanding stick was bowed.
IMAGE SANDINGSTICK
You’ll use this like a file to work one side of the neck heel and then the other. Just sand the heel edges. Carefully (of course). Remember that we’re working towards that wedge-shape and that the point P — up at the fingerboard — shouldn’t move. As luck would have it, though, sanding like this means that almost nothing is removed up at the heel-fingerboard intersection. The sanding stick butts against the fingerboard as you work and your strokes mean the lower sections naturally see more sanding action. Still, be careful and keep an eye on things. Don’t try to get everything in one go. Work in increments.
This work is easiest with the neck held in a vice. Sand a little on one side and then flip to the other (one side will have you working with your non-dominant hand so take a little more care there). Work the second side as close as you can to the first. Then take a look at the end of the heel. You’ll probably have a small section in the middle where your sanding stick didn’t reach. You need to take care of this little ‘island’ before you go on. Use your sanding stick or a chisel and keep it as even as possible with what you’ve already done on your sides.
At this point, you’ll have taken off a portion of your wedge. Now reexamine your dished, internal heel section. Your sanding will have increased the shelf portion of the heel face. Consider re-dishing to narrow it again if needed.
Then repeat.
Work in a few stages until you get to your marked line (remembering that this is actually not the full amount you calculated you needed to remove).
The rest of that removal, you’ll handle differently. Your ‘gross’ reset work is done and now it’s time for the fine tuning.
And that’s where we’ll take things up next time.
A round-up of this neck reset series


This article written by Gerry Hayes and first published at hazeguitars.com


The final touches. Everything’s back together and the reset is done. Just a few last considerations.