
Neck Resets 2: Beginning to remove the neck
Now we’ve looked at why you might need to consider a neck reset, it’s time to start digging into how it’s actually accomplished.
Removing a guitar neck: Part 1
We’ve got to get that neck off in order to perform the re-‘set’ the angle it attaches to the guitar body. This comes with varying degrees of difficulty, depending on how the guitar’s constructed.
Exceptions: Before we begin, let’s take some ‘exceptions’ off the table until another time. Newer Taylor guitars are a category all of their own and we’ll talk about them at a later date. Likewise, doweled butt-jointed necks bring some complications and hard choices. Most classical-style instruments are not easily (or even feasibly) reset and we can discuss why later.
For now, let’s consider our two main options. Bolt-on necks and glued-in dovetail neck joints.
And the first step is common to both bolt-on and glue-in necks.
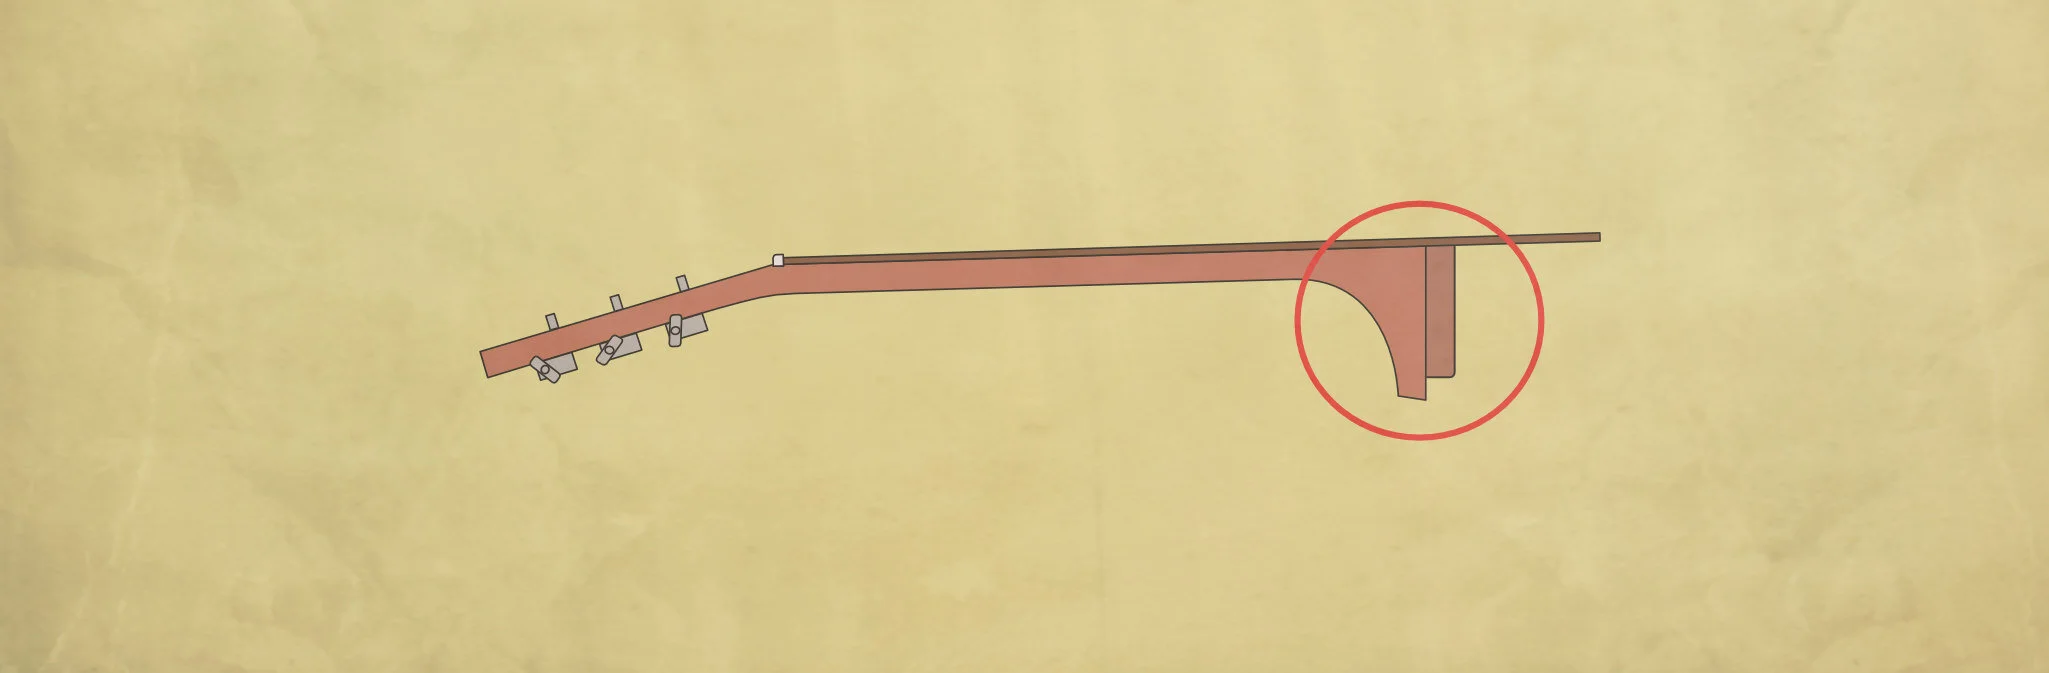
Loosening the fingerboard extension
The length of fingerboard between the body-join (usually the 12th or 14th fret) is typically glued to the guitar top. This has to be loosened first.
And, to loosen the glue, we heat it.
The old-school method is a heating iron. It’s a chunky block of metal that’s heated on a hotplate before being placed on the fingerboard extension. The heat would conduct its way down to the glue, eventually causing it to let go.
A slightly easier method uses an electric heating blanket to accomplish the same job. Luthiers’ Mercantile has a selection of blankets sized for particular guitar jobs. Very useful. I use these almost exclusively for this job now.
As with any guitar work involving heat, we need to take care not to overheat anything that’s going to react badly. Fingerboard binding won’t like too much heat and pearloid or plastic inlays can singe or even melt. You can usually avoid the binding and it’s worth protecting the inlays with a layer or two of foil. That said, have a plan to replace inlays later as you may need it.
I clamp my heating blanket loosely on top of the extension with a wooden caul. This really just keeps it in place and you don’t need heaps of pressure.
How long do you you leave the blanket heating? Depends. The initial heating might take a few minutes but keep taking the blanket off and checking. The heat will conduct through the frets and fingerboard relatively slowly at first. Give it a couple of minutes and test to see if you can work a spatula or palette knife between the fingerboard and top (I start right at the soundhole).
If the knife won’t go in easily, give it another minute’s heat and try again. Repeat. Don’t forget that, as you’re waiting for the bottom of the fingerboard to heat, the top of it is already pretty hot — keep an eye on those inlays. Oh, and don’t do anything silly like leaving your heating blanket resting on the guitar finish as you check things.
After a few minutes, you should find your palette knife can slide into the glue joint without too much resistance. When it does, you can begin to carefully work it around, freeing more of the fingerboard area. If you hit resistance, don’t force things. Heat the area a little more and try again.
Work as slowly as you need until you’ve freed the whole extension up to the body joint.
A note on extension bolts
Before you do any of the above, pop a mirror in and examine underneath the fingerboard extension. It’s not incredibly common but there are some instruments that will have a bolt or two holding the extension section in place too. If so, you might be able to avoid some heating and spatula-work.
A note on finish
Before heating anything, you might want to check for any finish along the joint between fingerboard and guitar body. Martin, for example applies finish to their guitar bodies and necks before they get glued together but many other makers, like Gibson, spray the guitar after the neck is on. This means the joint areas will have a little meniscus build-up of finish.
You should expect to do a little finish touch-up when resetting these at the best of times but, it’s probably a good idea to score along the joints with a very sharp craft knife before you start. It’ll help to minimise chipping.
Removing the guitar neck: Bolt-on
With the fingerboard extension loosened and detached from the guitar top, it’s time for the main ‘connection’ between neck and body.
For many bolt-on neck guitars, this will involve nothing much more than loosening out a bolt or two. Sometimes, the bolt heads may be located under a paper label — showing maker logos or serial numbers — that’s attached to the face of the neck block. If you heat the label gently (a hairdryer on low) you might be able to remove it without too much damage but, not always.
Some instruments have a small wooden panel, rather than a paper label. This might be glued on or held with double-sided tape. Again some gentle and slow heating should loosen the adhesive enough to wiggle the panel free. They generally free up pretty easily. If you’re worried about inadvertently heating braces or adjacent glue joints, you can make yourself a rough tunnel of foil to direct the heat more accurately but be aware that things will still be heating up within the inner soundbox as you go. If you’re having trouble and feel things are getting too warm, leave it and regroup. It shouldn’t take a lot of heat.
Once you can see the bolts, it’s an easy job to back them out. A ratchet wrench, extension bar, and selection of sockets are probably your friends here. Allen/hex head bolts are used sometimes too (and that ratchet wrench is still pretty helpful if you've got hex heads for it). Undo the bolts and pop them somewhere safe (along with any washers). Neck off. Great.
Martin Guitars add a wrinkle to the ‘bolt-on’ classification. They’re actually a sort of hybrid construction. As well as a bolt pulling the neck into the body, there is also a — glued-in — mortice and tenon joint for additional stability. That means we need to handle this joint like we’d handle a regular glue-in dovetail joint.
As we’re already up above a thousand words, though, I think we’ll leave the next step until next time.
A round-up of this neck reset series


This article written by Gerry Hayes and first published at hazeguitars.com


The final touches. Everything’s back together and the reset is done. Just a few last considerations.