
Neck Resets 7: The 'Fine' Reset
We’ve reached what I’ve been referring to as the ‘fine’ part of the reset. This is probably the most important part. Here’s where you dial in your set-angle perfectly. Also, during this phase, you’ll carefully adjust each side of the heel to ensure your neck’s properly centred.
To be honest, you could potentially skip the previous, ‘gross’ part of the work and only reset using this technique. It might take longer but it’s perfectly valid. And, when you’re only making small adjustments, starting here is just peachy.

Neck Reset - Fitting the neck
We’re going to be fitting the neck onto the body at this point so, in most cases, I’d recommend using some sign-painter’s tape or some very low-tack masking tape to give a little protection to the guitar body, either side of the neck heel.
Cut some strips of sandpaper, about an inch wide. We’ll start off with 120-grit.
With the body upright, loose-fit the neck into the dovetail. Insert a strip of sandpaper between neck heel and guitar side (abrasive side facing the neck, obviously). Make sure it’s touching the full length of the neck heel. Carefully apply some pressure seat the neck as close as you can to its normal position and then pull the sandpaper out.
As you pull the sandpaper, pull out and down (away from the heel). If you don’t, you risk sanding a ramp-up into the bottom of the neck heel and you definitely don’t want that.

The sandpaper strip must be pulled out and downwards
The sandpaper will begin to cut the neck heel and, because it’s pressed against the guitar side, the cut will start to conform the the shape of the side. This is how we’ll end up with a nice close fit between heel and body.
I’d say, make one or two passes on one side and the same on the other. Then (and this is important to remember), make the same number short pulls at the end of the neck heel only. This is to knock back that little island that gets left in the middle.
As a slight aside, it’s worth pointing out how all this sanding can occur without moving the point where the heel and fingerboard intersect (point P in our previous discussions). The sandpaper is pulled from there but almost nothing is sanded off that point. Every point lower than that sees more of the sandpaper’s length as you pull. So, the bottom of the heel gets the most sanding while, up at the fingerboard, there’s practically zero.
Centre Line
Back to the reset. Now’s the time to check our centreline. It’s likely that the work we’ve done to each side of the heel will not have been completely even. Press the neck into place and use a long straight-edge to check a line from the centre of the nut, though the centre of the last fret, to the centre of the bridge.
IMAGE CENTRE LINE

The neck centre line must line up with that of the body
It’s useful to measure and mark the centres on the fingerboard and it’s definitely useful to add a strip of masking tape to the top of the bridge so you can make a pencil mark to assess.
Check your centre-line and note if the neck is nudged a little towards either treble of bass sides.
If your centre-line is nudged towards the bass side of the bridge, you’ll want to remove a little extra material from the bass side of the neck heel. This allows the heel to sit down more on that side, nudging the centre-line back towards centre. Obviously, reverse this if your centre-line is nudged towards the treble side.
Take another pass or two with the sandpaper on the appropriate side and reassess your centres. Do this until your centre-line is aligned with the centre of your bridge (between the D and G pin holes).
Fine-tuning the neck set-angle
Now we have the centres sorted out, we can check our set angle. Use a straight-edge again but this time, lay it along the top of the frets and see where it contacts the front of the bridge. Remembering way back to the start of this process, our ideal contact point is right at the top of the bridge. Assuming we haven’t done anything daft, ours should be a lot closer than when we began but should have a little ways to go.
So we go at our sanding strips again. These wear relatively quickly so be prepared to use plenty. Probably a half-dozen pulls each side is enough before replacing.
Now that you have your centre-lines, make sure to count the number of passes you make each side. Keep each side of the heel (and the island-passes at the end) the same.
Keep checking set-angle and it’s definitely worth re-checking centre-lines often as they can wander.
As you begin to get close to your correct set-angle (straight-edge hitting the top of the bridge, switch up to 220-grit sandpaper strips. This will slow progress and make a smoother cut, giving a better neck-to-body fit. Shift to 320-grit right at the end.
Keep checking angles and centre-lines.
Keep. Checking.
A couple of tips
If the lacquer along the edge of your neck heel is a little chippy (common), you can brush a really tiny amount of thinners in a super-fine line along the edge. Like, really fine. It’ll soften the lacquer just a little and help keep it from chipping. That said, you can probably expect to do a little finish work in many cases (or a little more finish work for builders who spray body and neck as one after assembly).
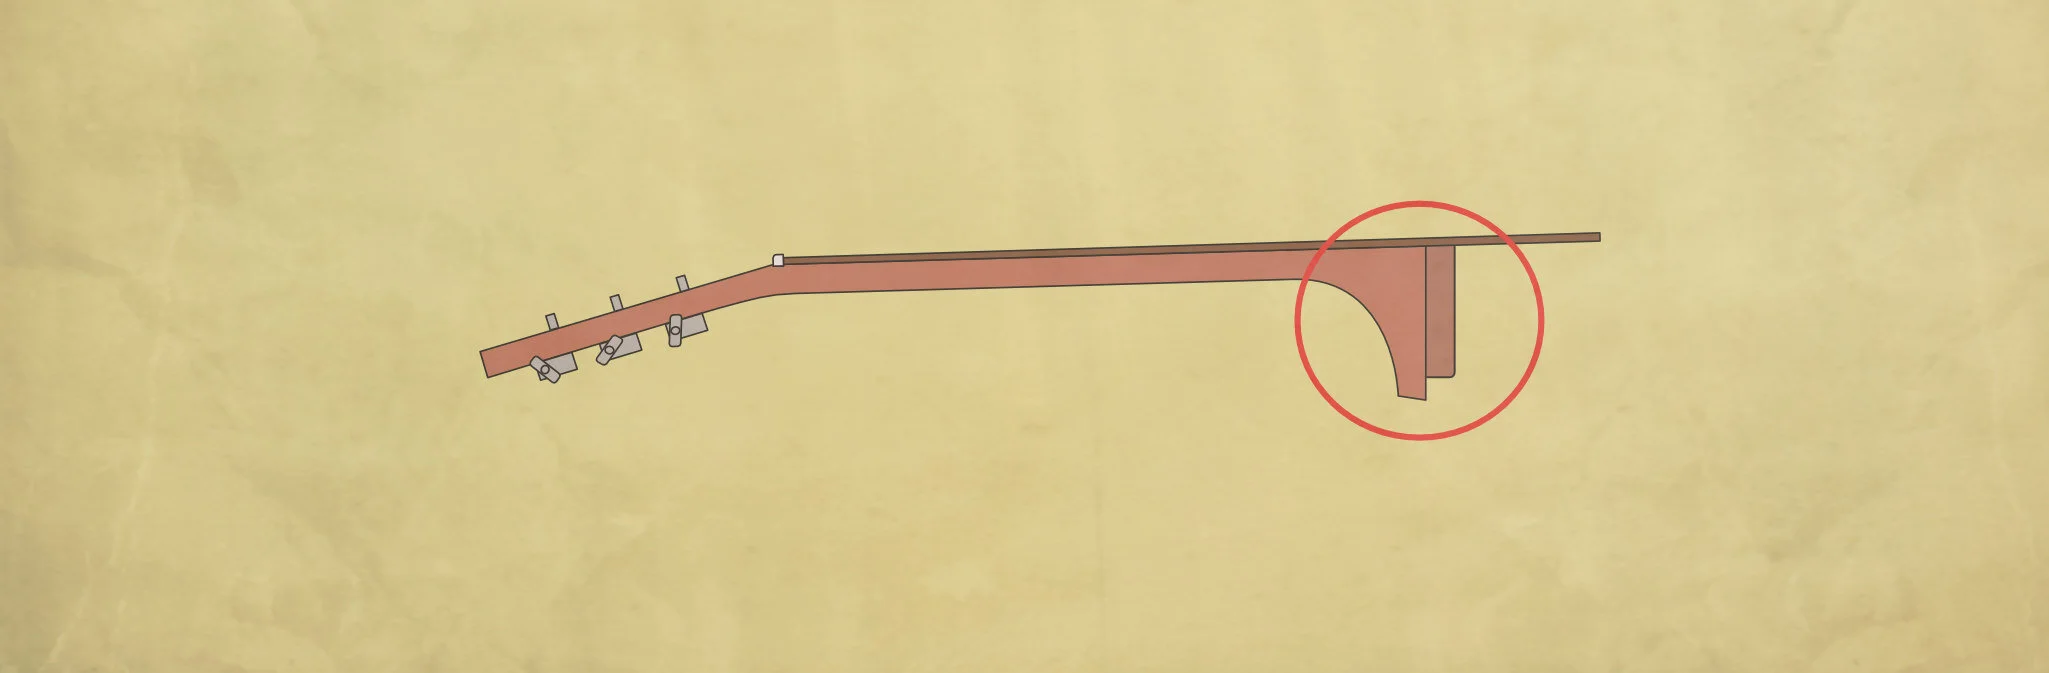
As you work, check your heel ‘undercut’ occasionally (see last week). If you keep the area being ‘worked’ narrow, it’ll be easier and more accurate so feel free to hit it with a chisel again as needed.
Some instruments pull into more of a belly as strings come up to tension. With no strings the bridge might sit lower. This can screw with your set-angle measurement. If you’ve a top-deflection gauge, you can measure precisely before you remove strings to start work. If not, you can eyeball it and take it into account. Then, you can use a scissor jack to simulate that tension-belly if you want. All of that said, in most cases this is overkill and you can proceed without worrying about this. I’m throwing it in for completeness and as a possible solution should you find things seem off when you’ve restrung later.
Phew. There’s a bit of work in all of this, isn’t there?
That’s it for now. Next time, we’ll look at getting the neck back on.
A round-up of this neck reset series


This article written by Gerry Hayes and first published at hazeguitars.com


The final touches. Everything’s back together and the reset is done. Just a few last considerations.